What is a CLI?
- A Command-Line Interface (CLI) is the interface you use to configure Cisco devices.
- In contrast, a Graphical User Interface (GUI) offers a visual way to interact with devices.
How Do You Connect to a Cisco Device?
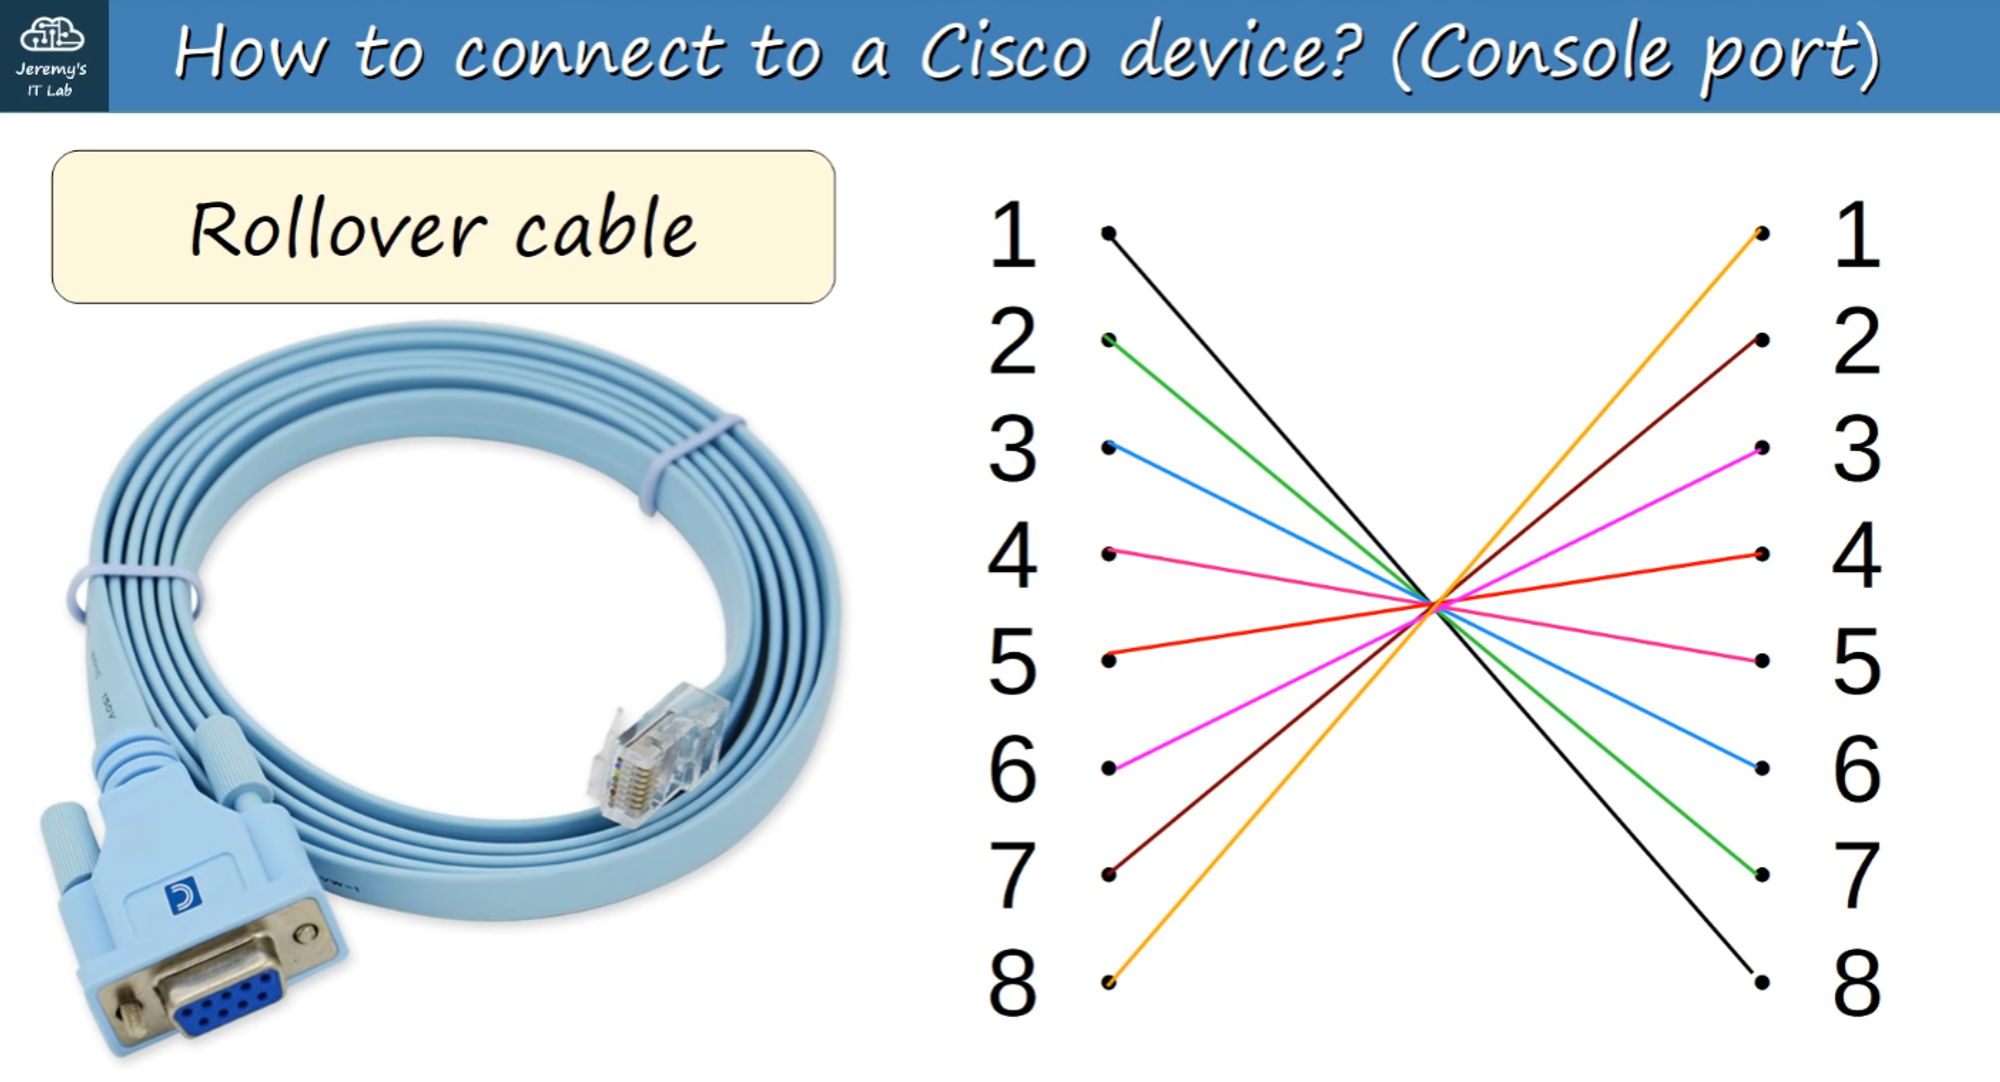
- Console Port: To initially configure a device, connect via the Console Port.
- Cabling: You can use a Rollover Cable, such as:
- DB9 serial connector to RJ45
- DB9 Serial to USB
Accessing the CLI
- You need a Terminal Emulator (e.g., PuTTY is a popular choice) to connect via “Serial” using the default settings.
Cisco Default Settings:
- Speed (baud): 9600 bits/second
- Data bits: 8
- Stop bits: 1
- Parity: None
- Flow Control: None
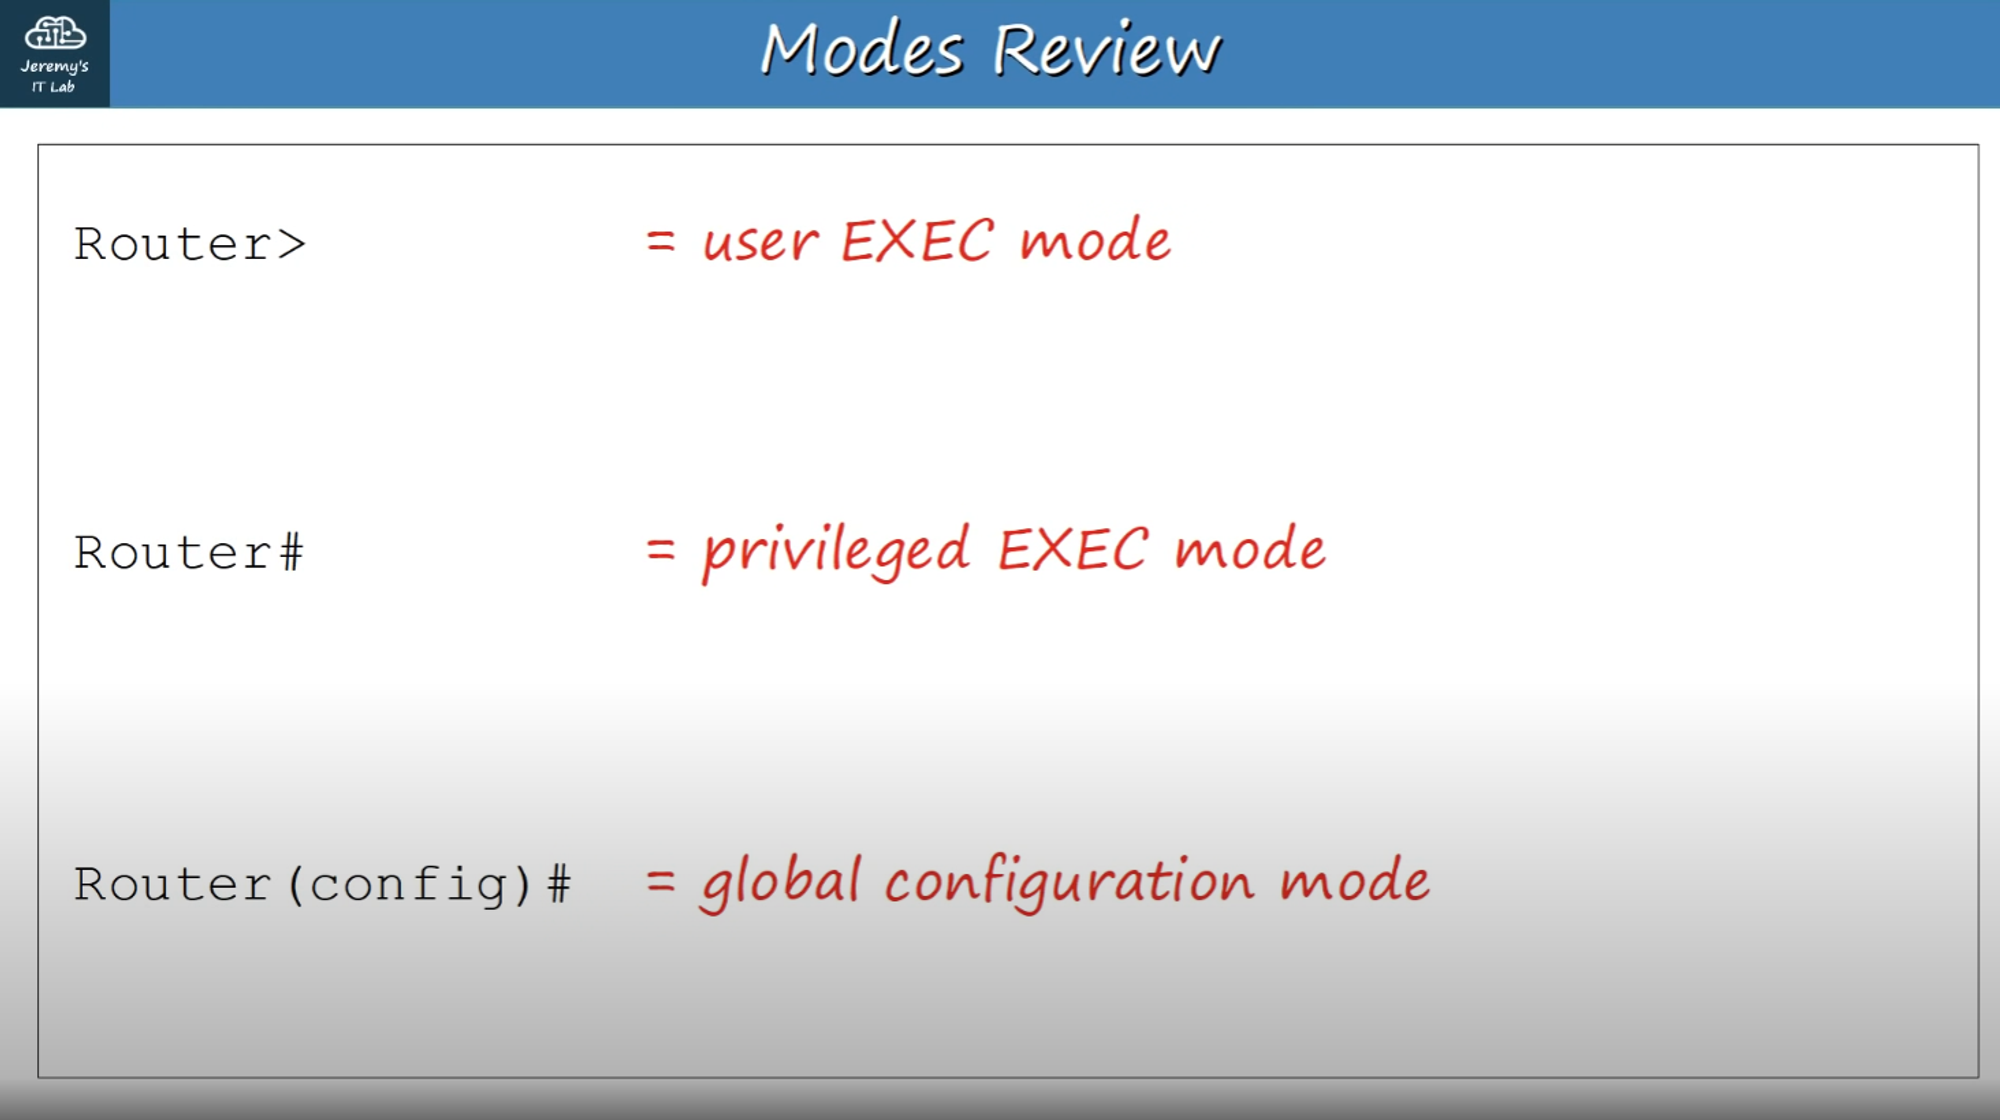
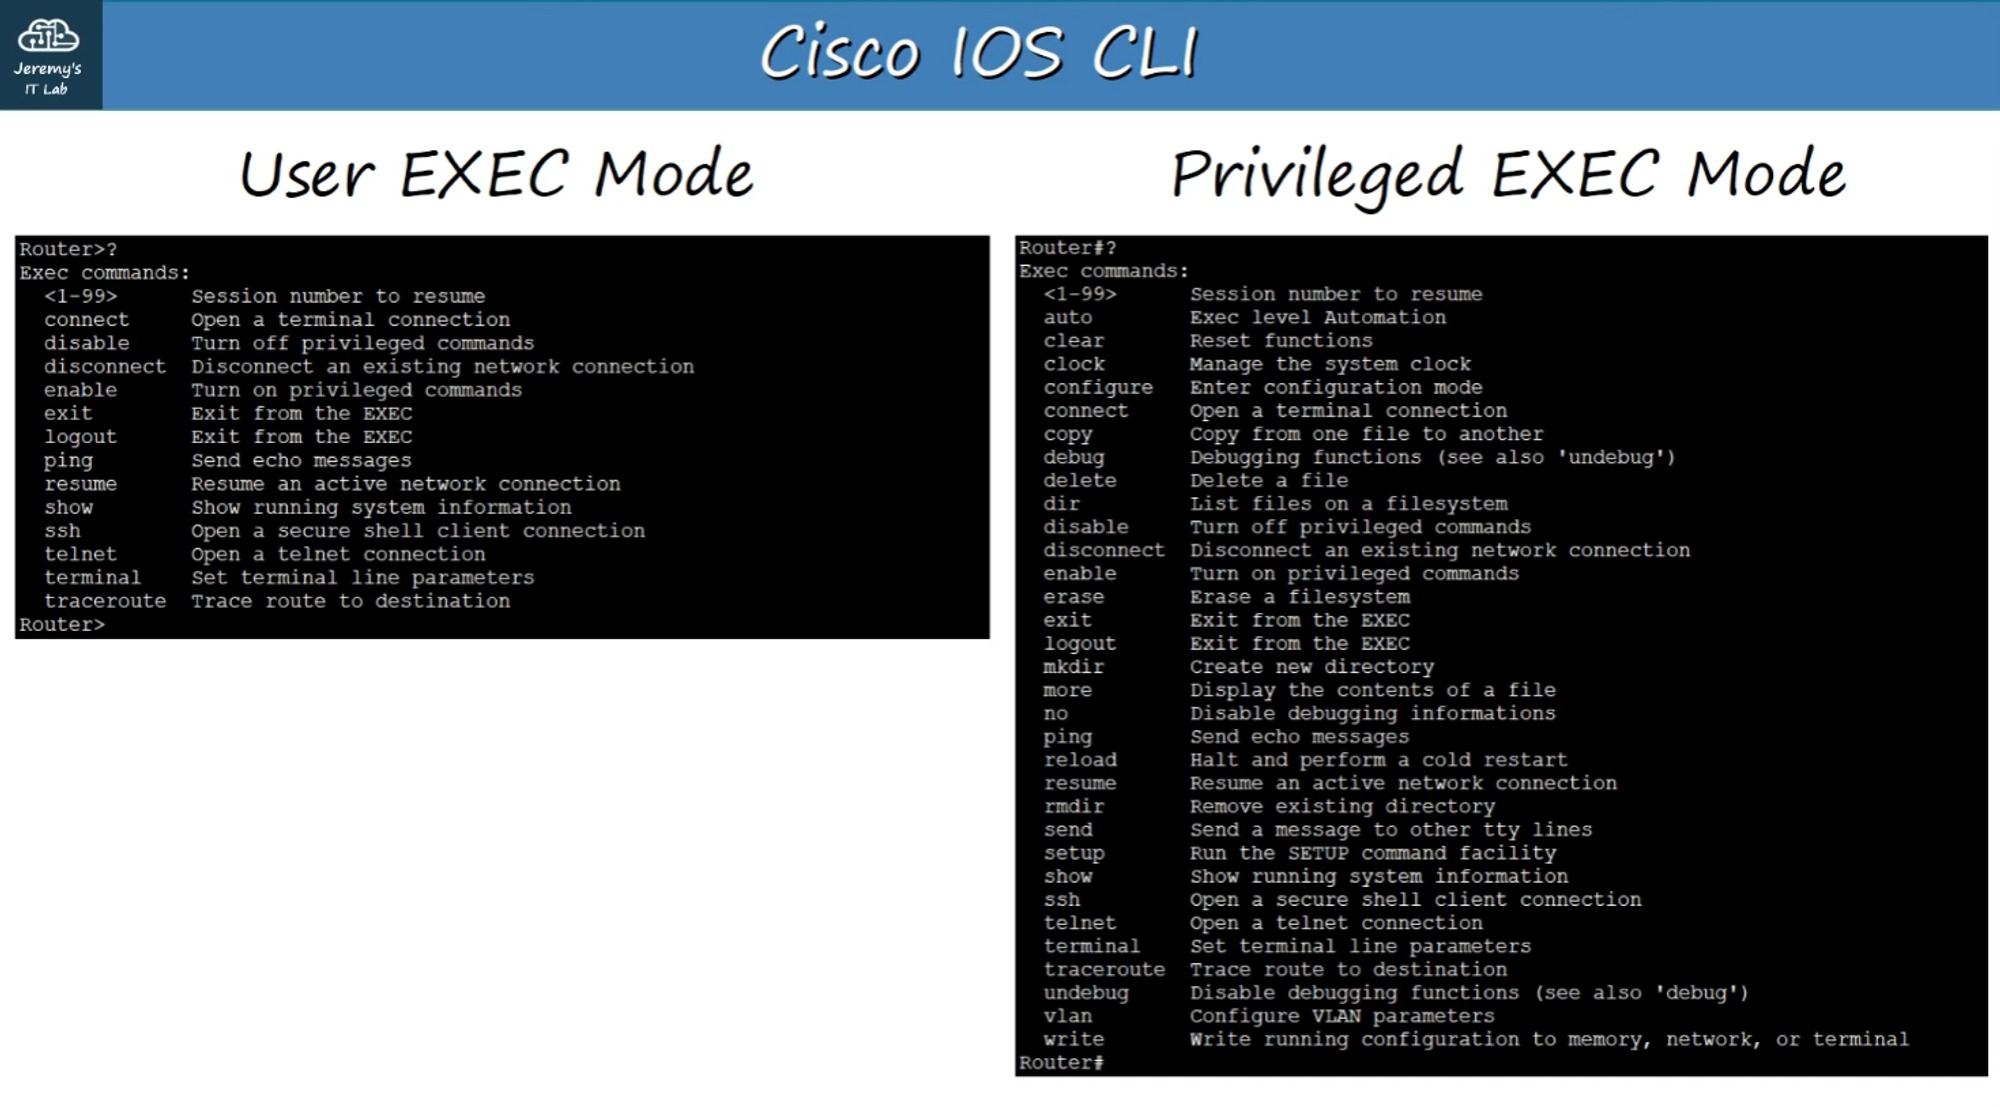
User EXEC Mode
When you first enter the CLI, you start in User EXEC Mode:
(Hostname) > // Prompt looks like THIS //
- Limitations: User EXEC mode is limited; you can view some information but cannot make any configuration changes.
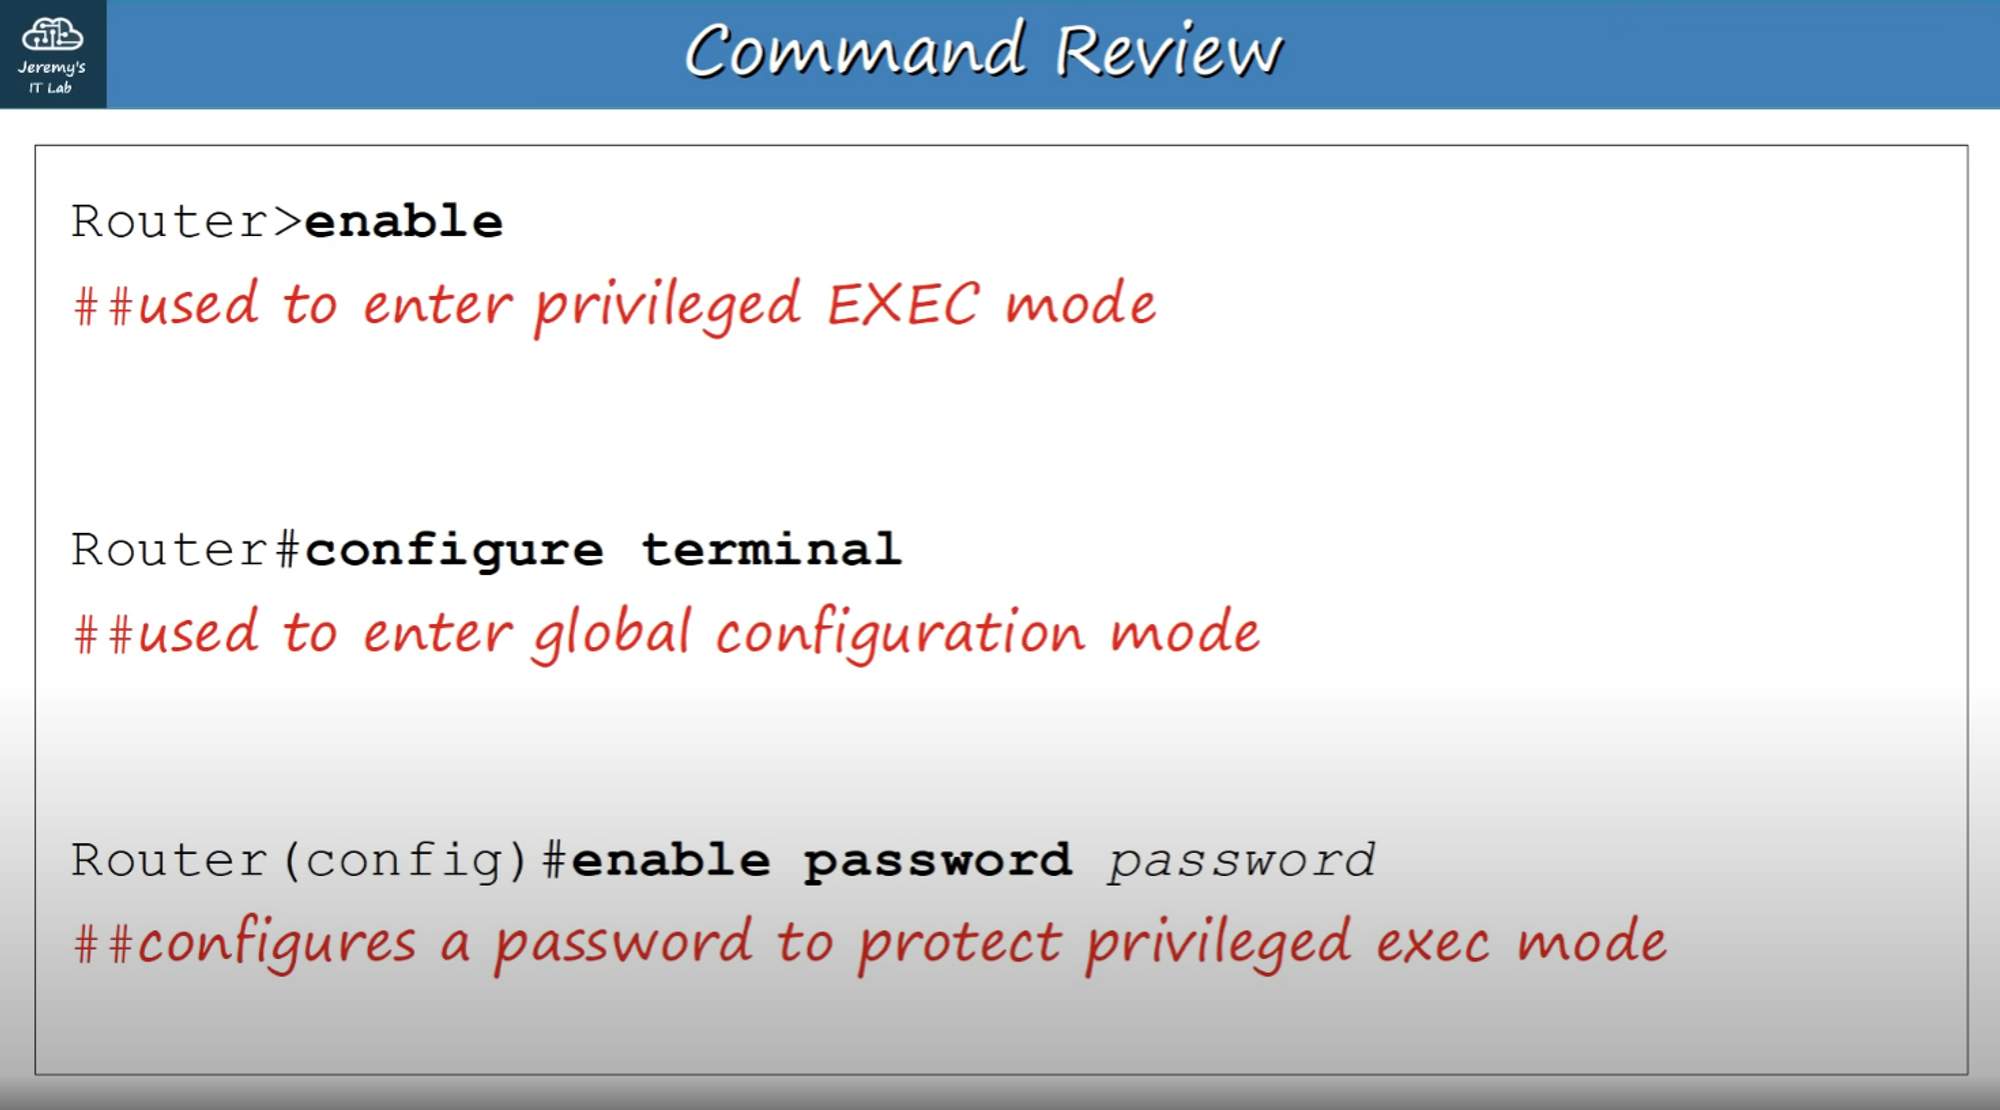
- Access Privileged EXEC Mode: Use the
enablecommand to switch to Privileged EXEC Mode.
Privileged EXEC Mode
In Privileged EXEC Mode, you have:
(Hostname)# // Prompt looks like THIS //
- Access: Complete access to view the device’s configuration, restart it, and more.
- Limitations: While you can change the time and save configuration files, you cannot modify the configuration.
Command Help
- Use a Question Mark (?) to view available commands in any mode. Combine
?with a letter or partial command to list all commands that start with those letters.
- Use the TAB key to complete partially entered commands if they exist.
Global Configuration Mode
To enter Global Configuration Mode, issue the command within Privileged EXEC mode:
Router# configure terminal
Router(config) #		// Prompt looks like THIS //
- To return to Privileged EXEC mode, type
exit.
Enabling a Password for User EXEC Mode
To set an enable password for User EXEC mode:
Router(config)# enable password (password)
- Passwords are case-sensitive.
Encrypting Passwords
To encrypt plain-text passwords visible in configuration files:
Router(config)# service password-encryption
Notes:
- Current passwords will be encrypted.
- Future passwords will also be encrypted.
- The
enable secretcommand is not affected by this setting.
To set an enable secret (which is always encrypted):
Router(config)# enable secret (password)
enable secretuses Level 5 encryption.
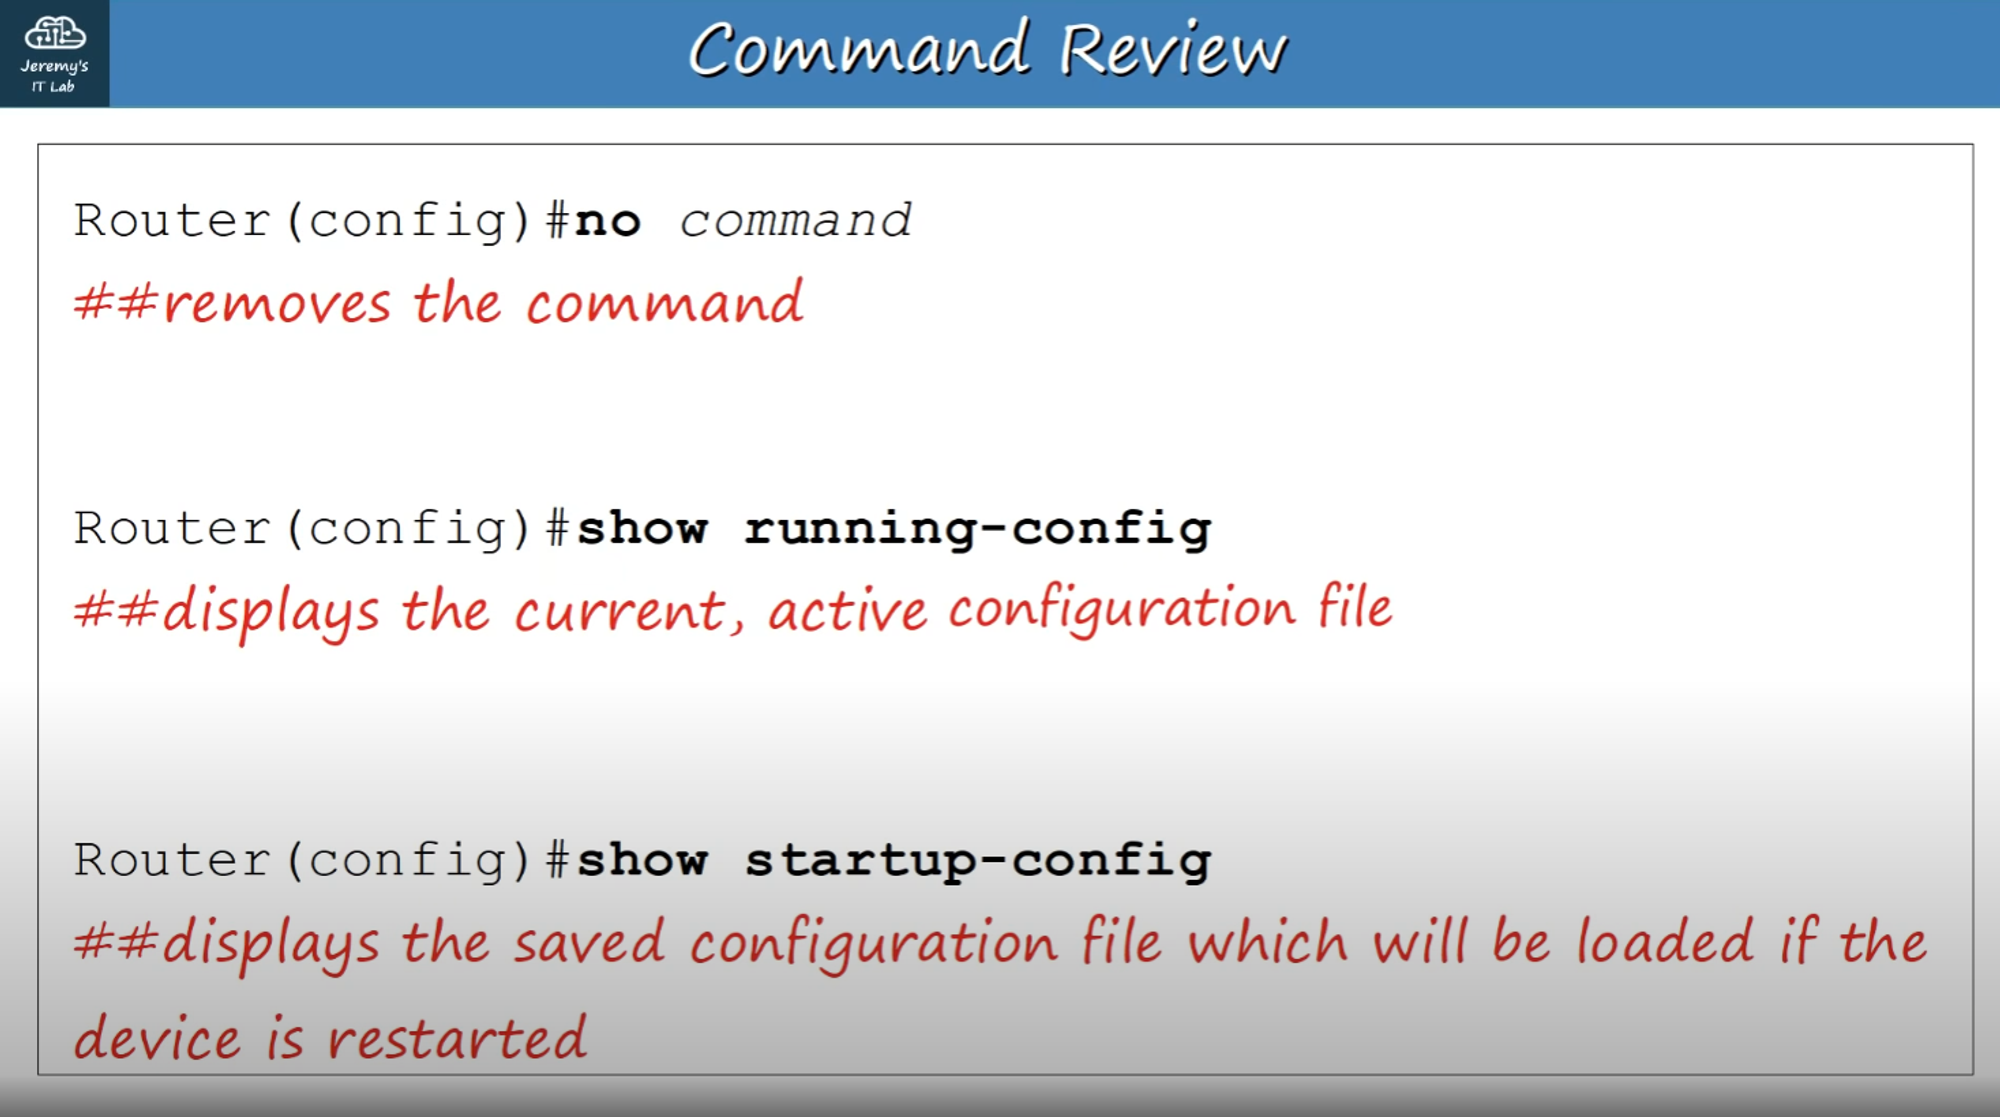
Configuration Files
There are two configuration files stored on the device:
- Running-config: The current, active configuration file.
- Startup-config: The configuration file loaded upon device restart.
To view configuration files in Privileged EXEC mode:
Router# show running-config    // For running config
Router# show startup-config    // For startup config
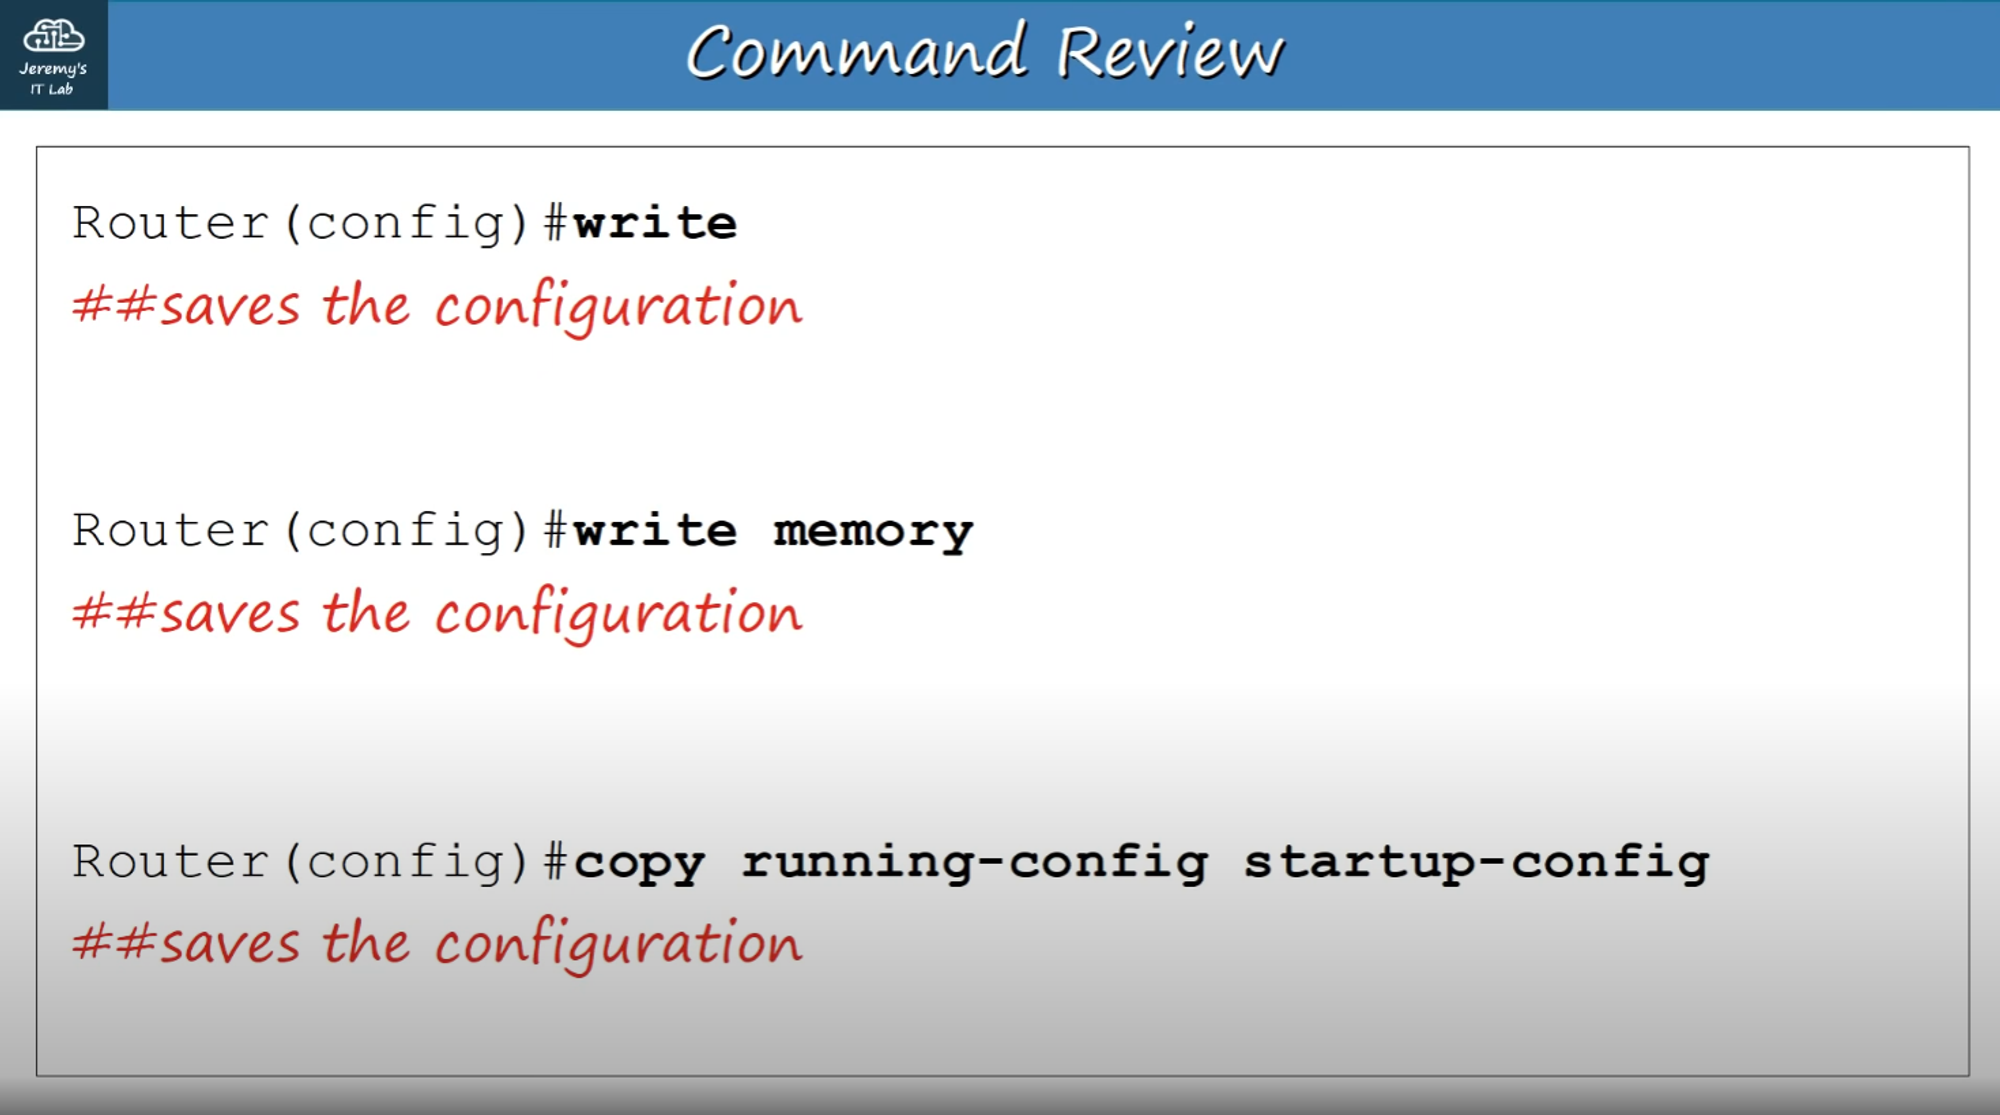
Saving the Running Configuration
To save the running configuration file, you can use one of the following commands:
Router# write
Building configuration...
[OK]

Router# write memory
Building configuration...
[OK]

Router# copy running-config startup-config
Destination filename [startup-config]?
Building configuration...
[OK]
Encrypting Passwords Again
To encrypt passwords:
Router# conf t
Router(config)# service password-encryption
- This will encrypt all current passwords and future passwords.

- The “7” indicates the encryption type used (Cisco’s proprietary encryption), which is relatively weak.
For stronger encryption, use the enable secret command:
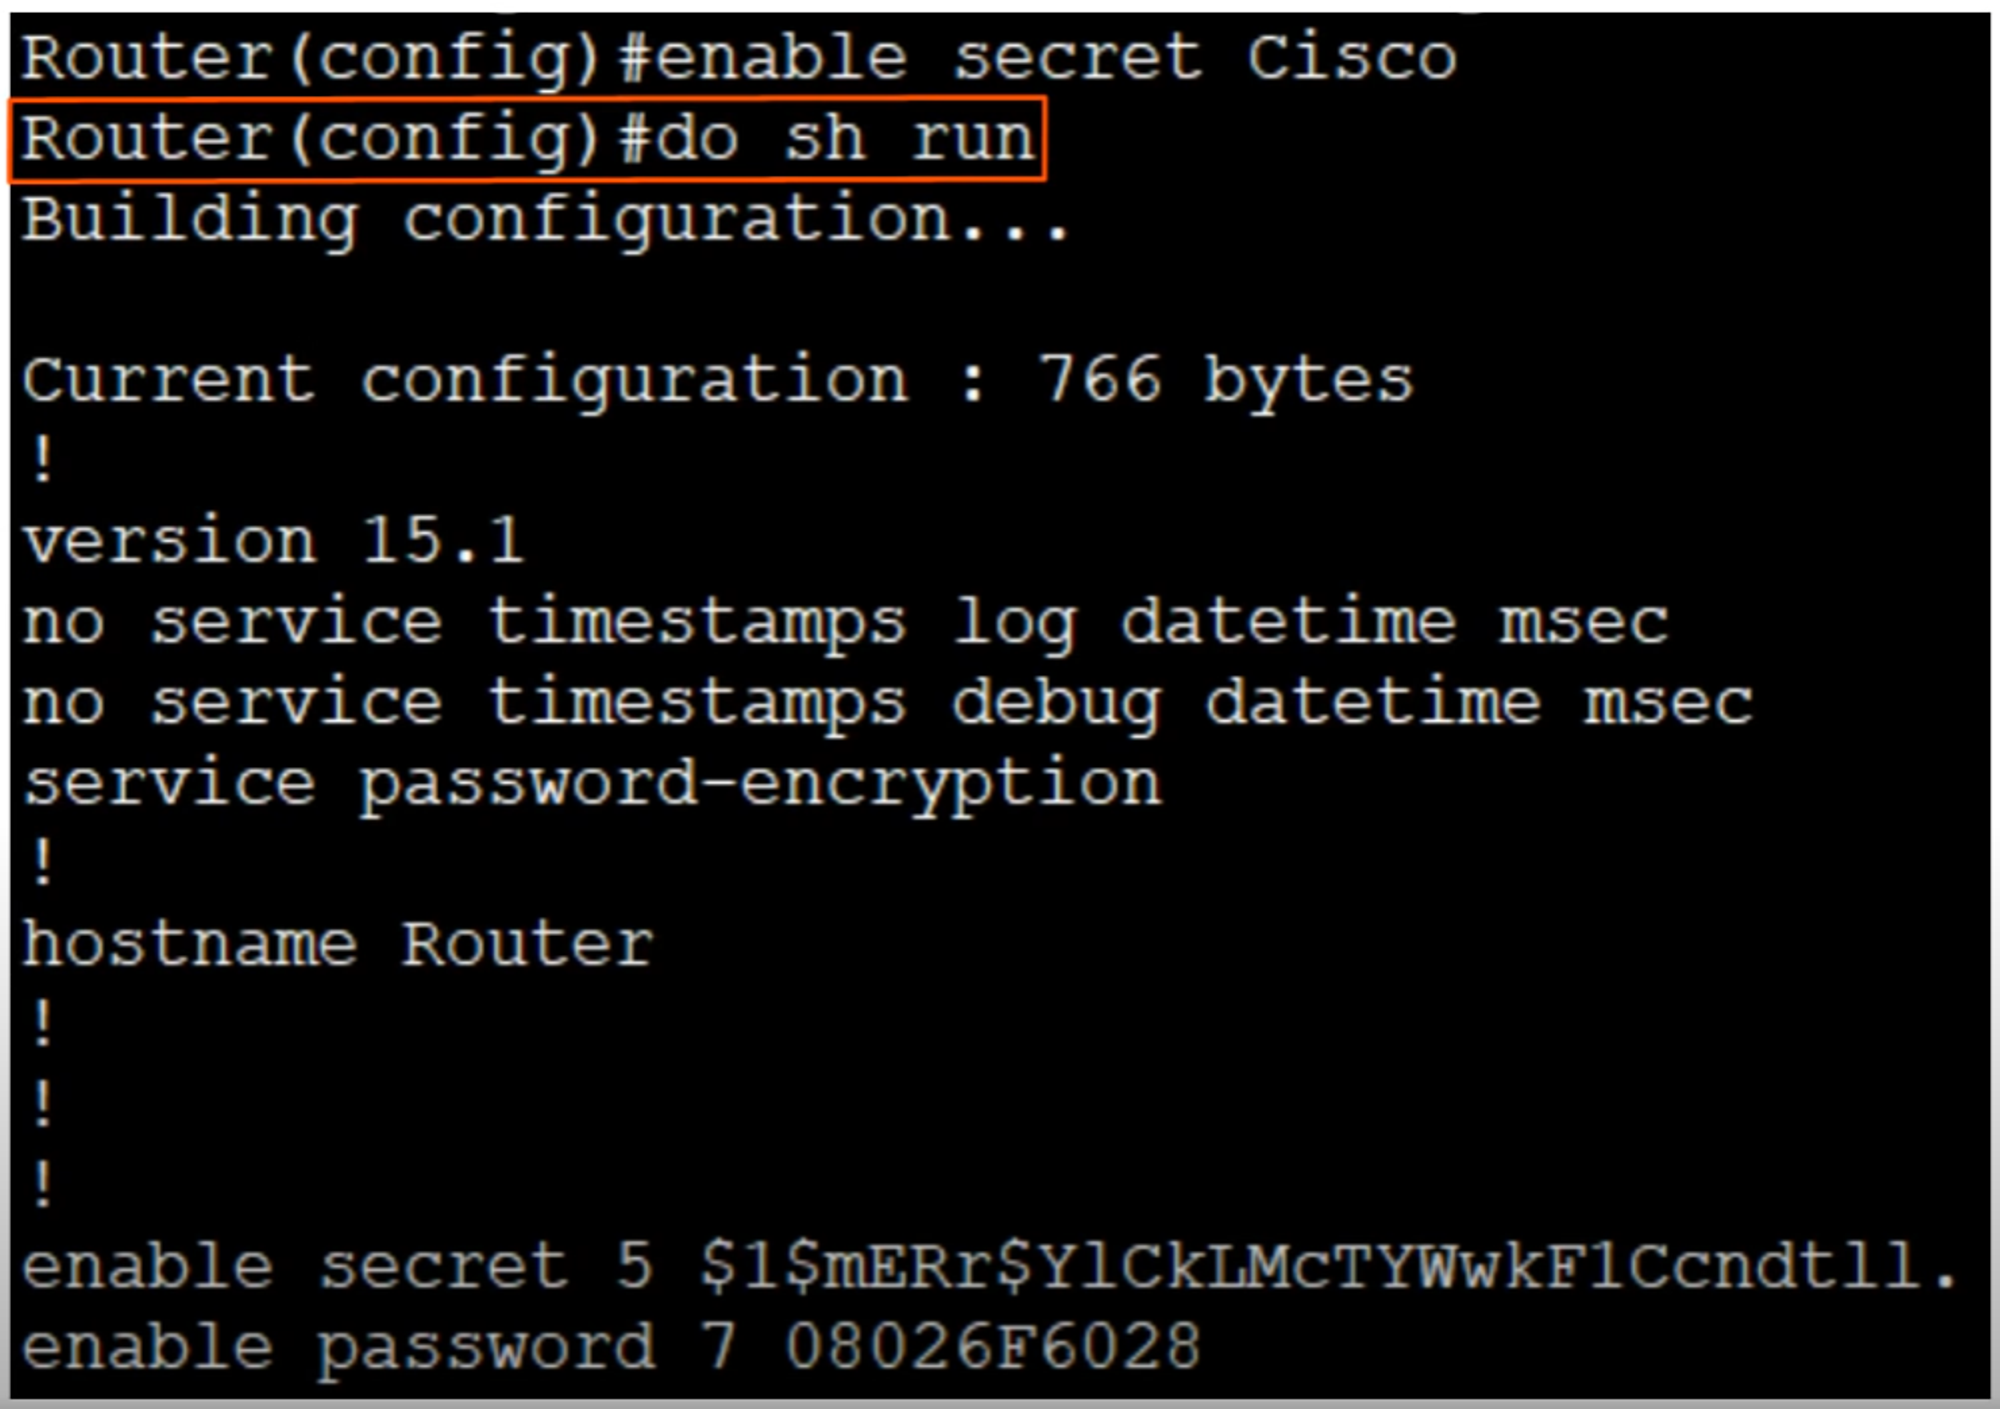
- The “5” indicates MD5 encryption, which is much stronger.
Once you use the enable secret command, it will override the enable password.
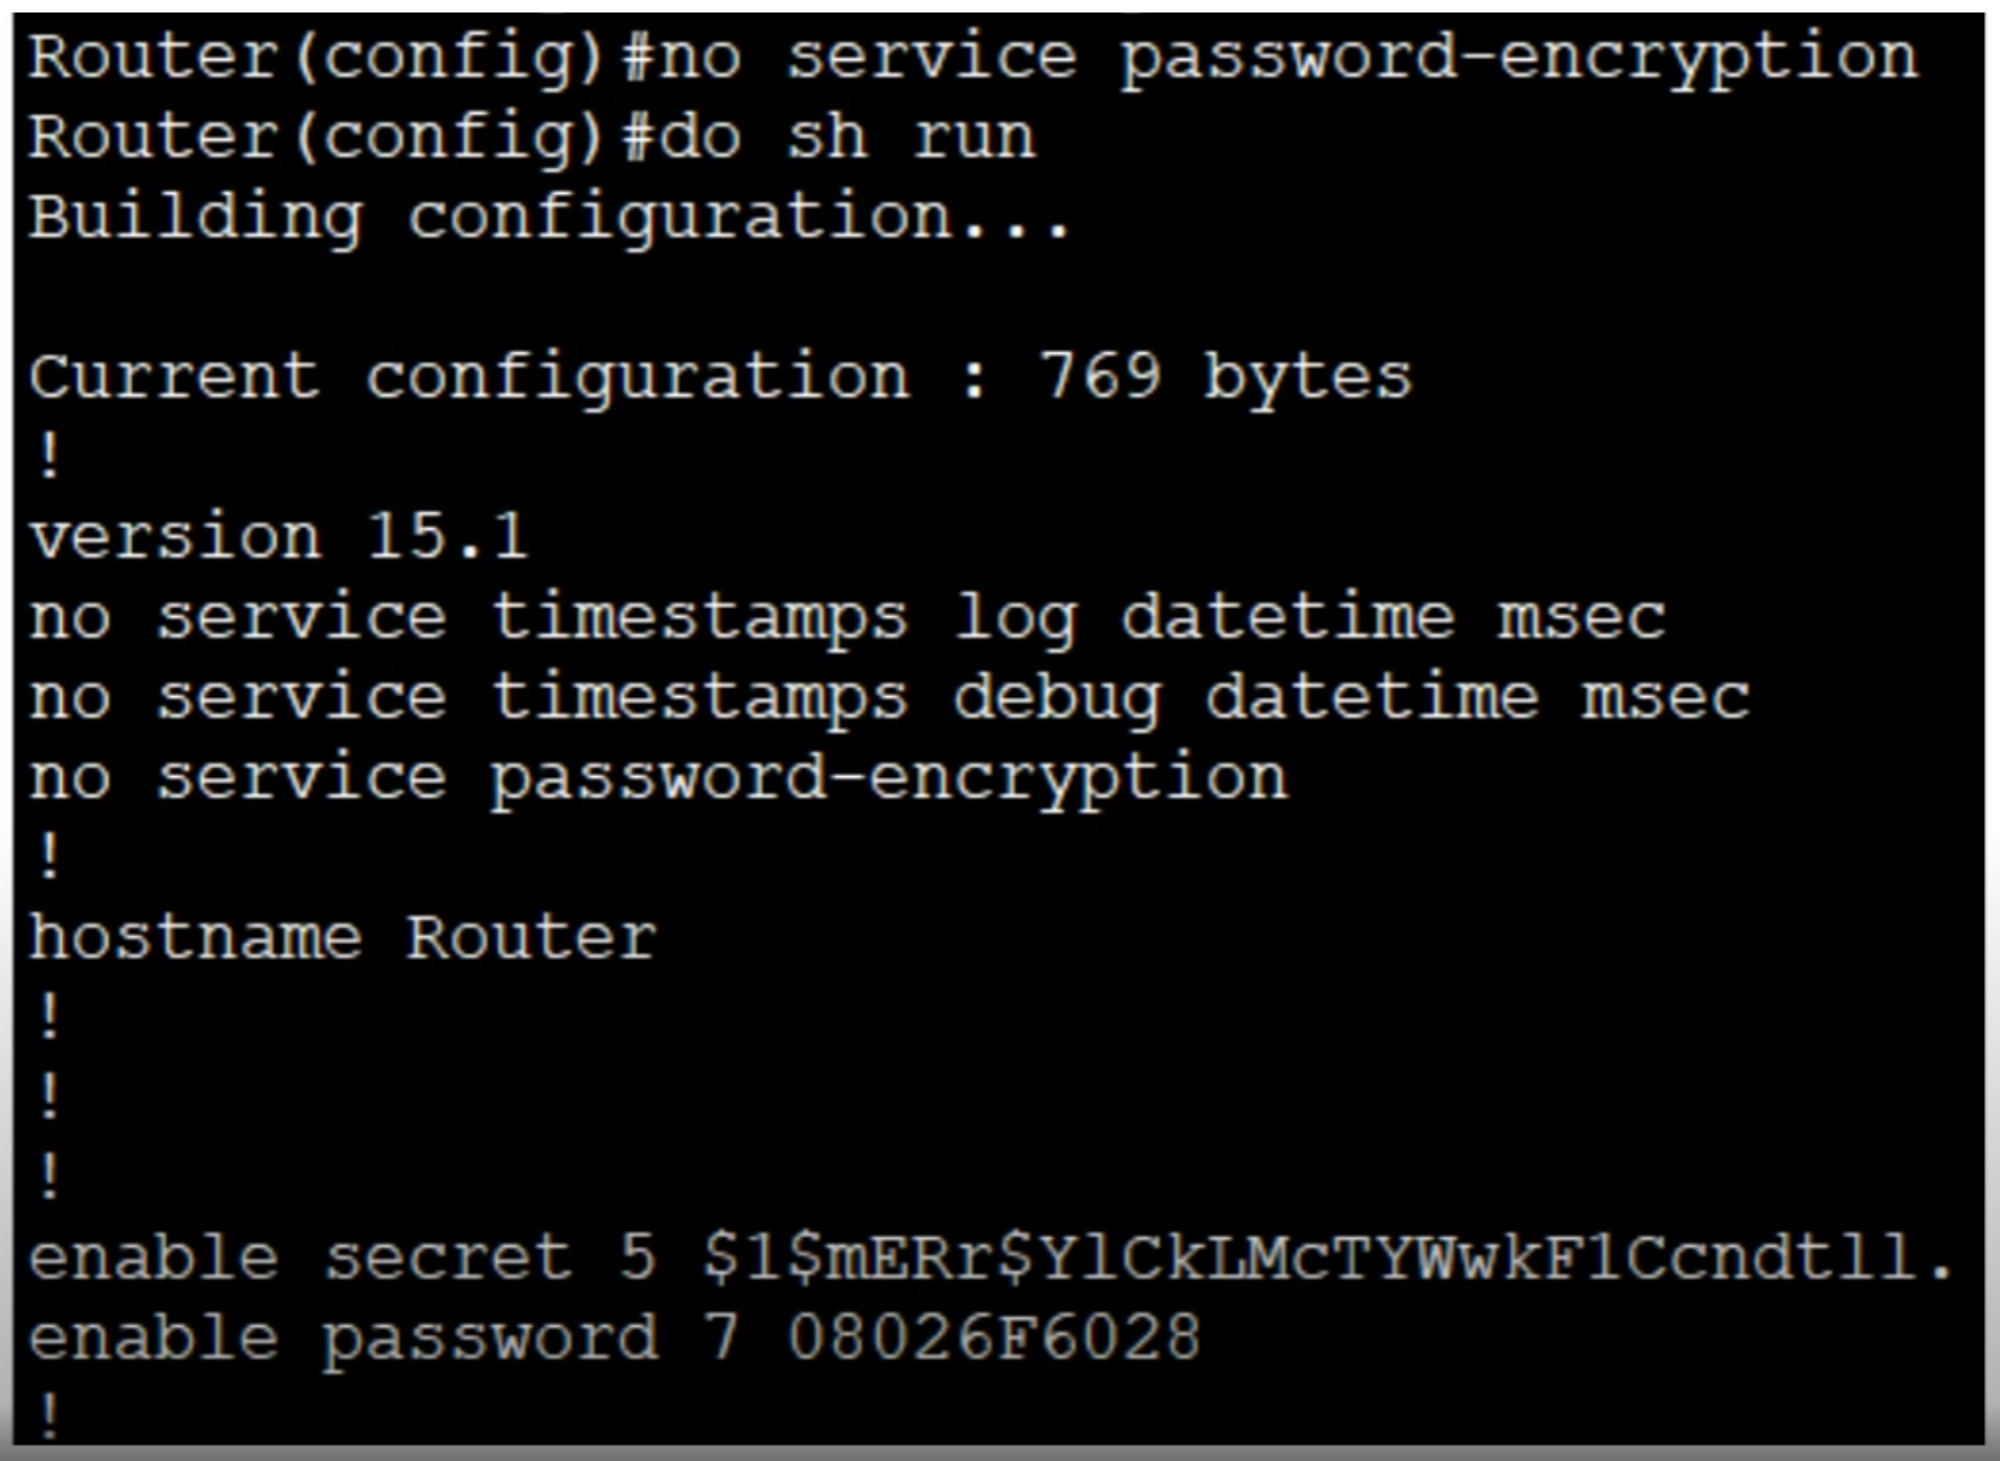
Deleting Commands
To cancel or delete a command you entered, use the no keyword:
For example, to disable service password-encryption:
Router(config)# no service password-encryption
- Current passwords will not be decrypted.
- Future passwords will not be encrypted.
- The
enable secretwill not be affected.
Additional Images