🔙 Retour à l’index
Why Is Time Important for Network Devices?
-
All devices (routers, switches, PCs, etc.) have an internal clock.
-
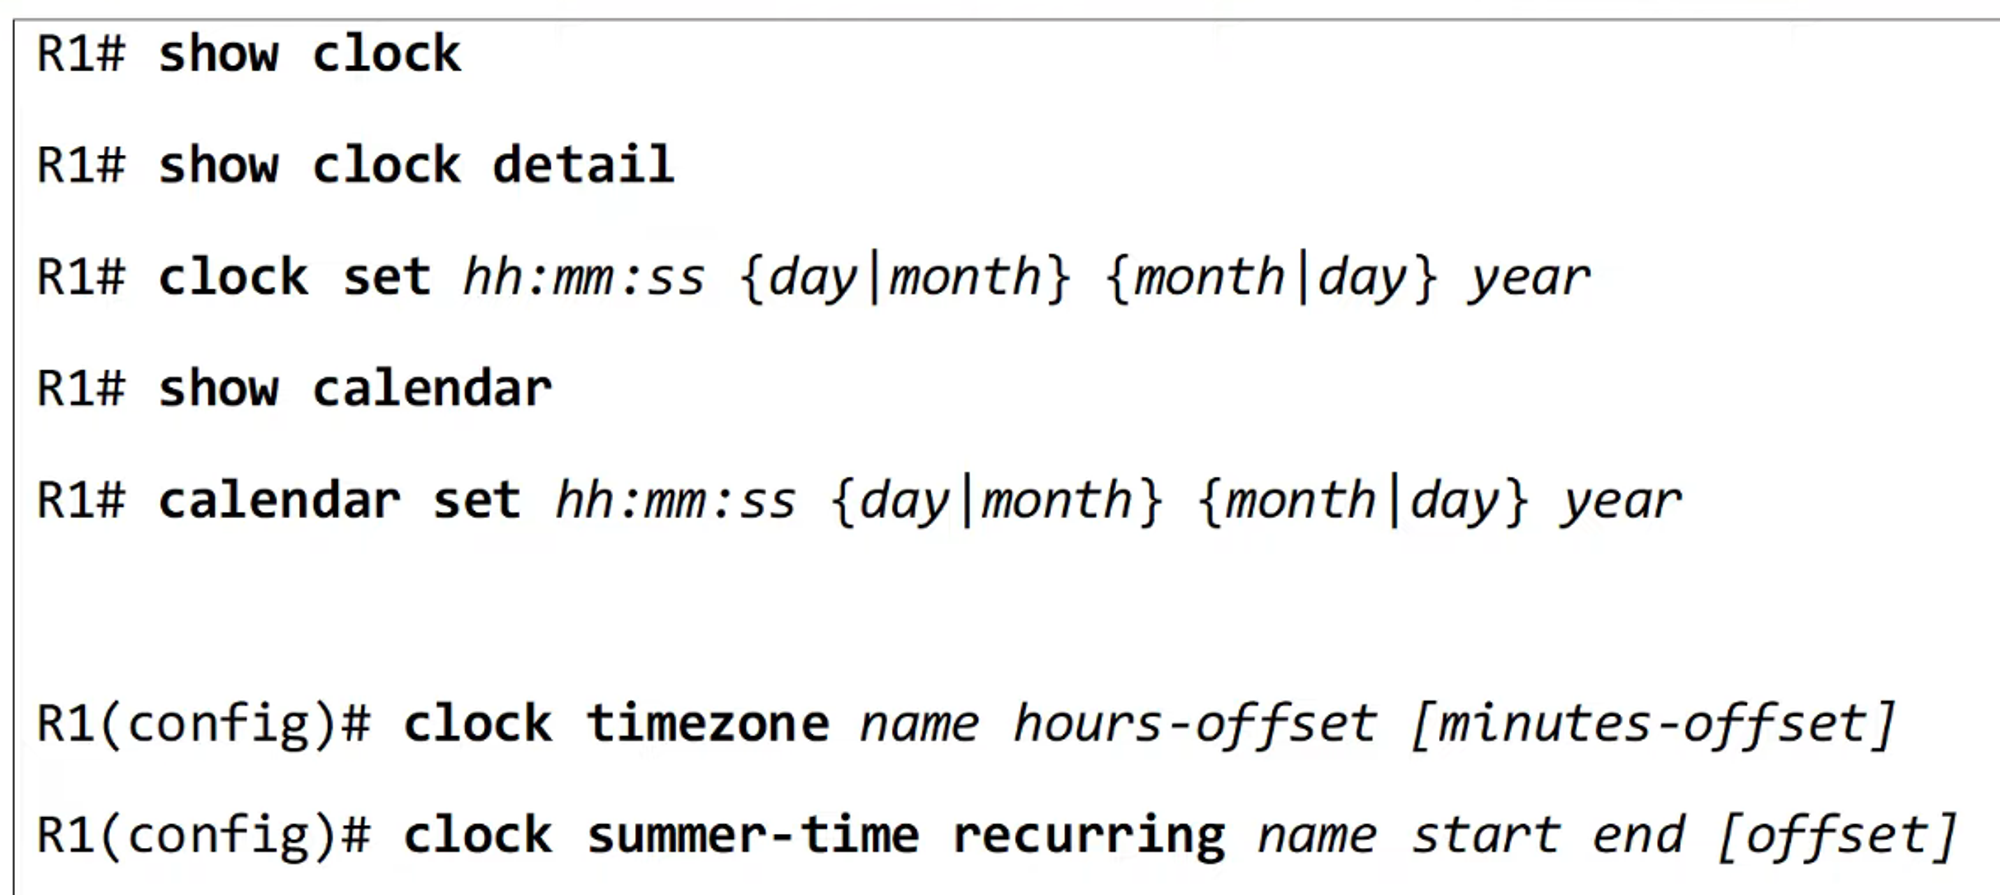
In Cisco IOS, the time can be viewed using the
show clockcommand.
-
The
show clock detailcommand shows the time source.
-
Over time, the internal hardware clock of a device will drift, making it unreliable as a time source.
-
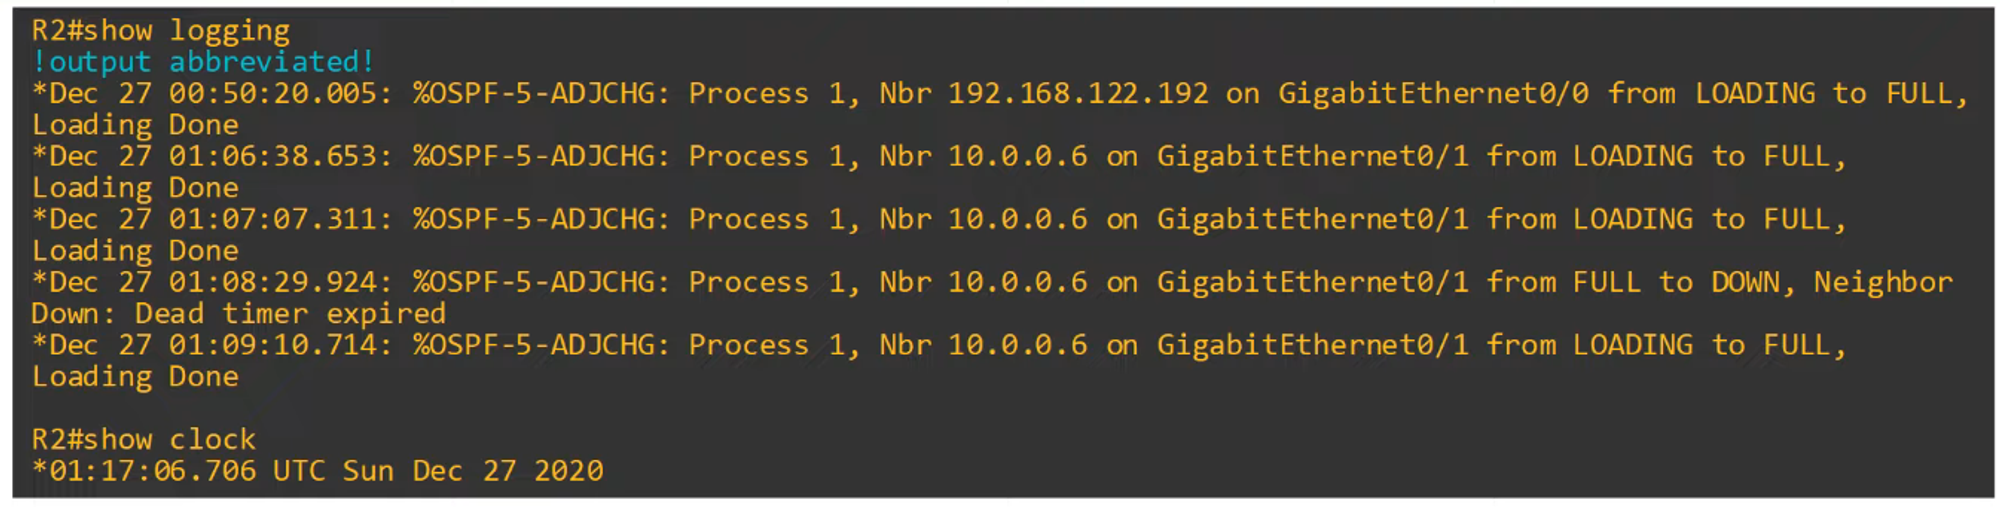
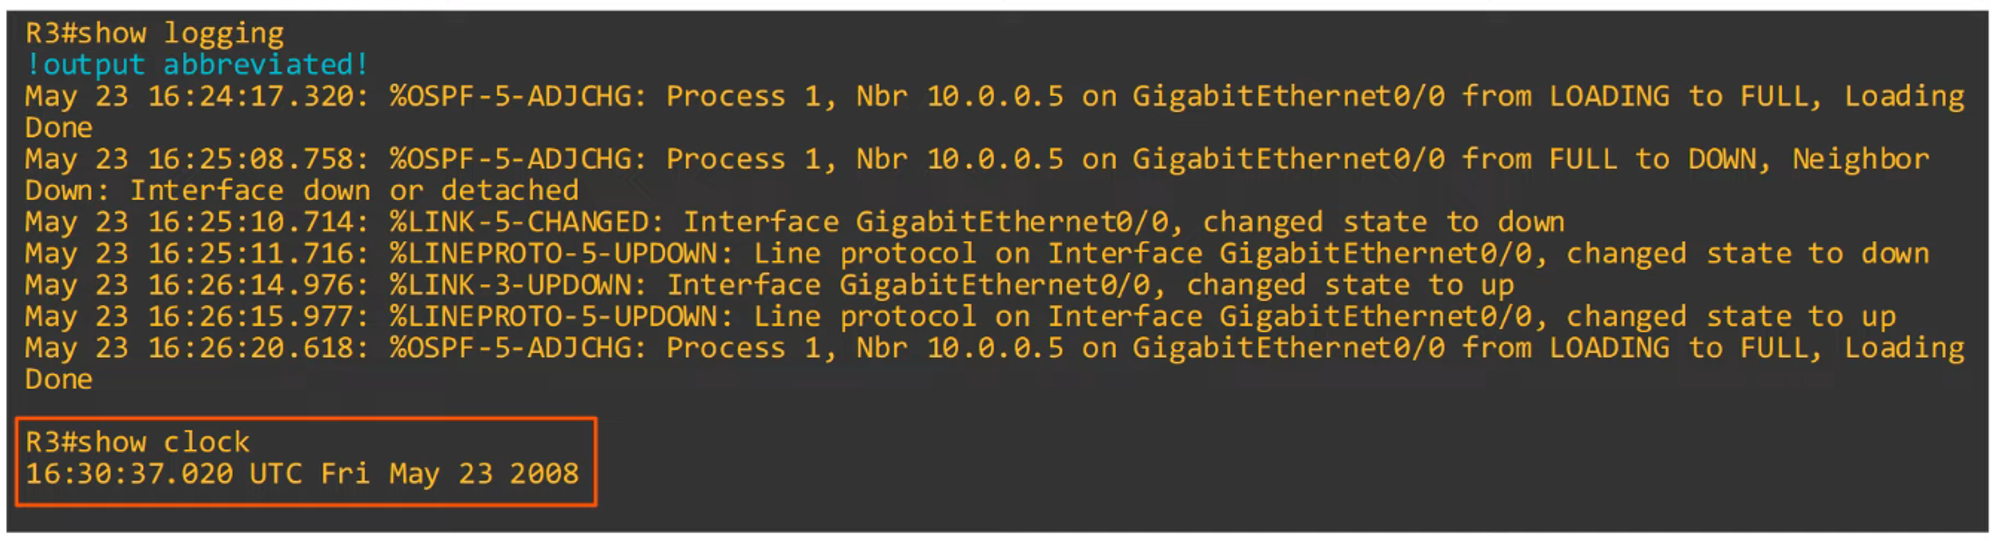
From a CCNA perspective, the most important reason for accurate time is to have accurate logs for troubleshooting.
- Example: Syslog, the protocol used for logging, relies on correct time. (Syslog will be covered in a later video).
- Command:
show logging
-
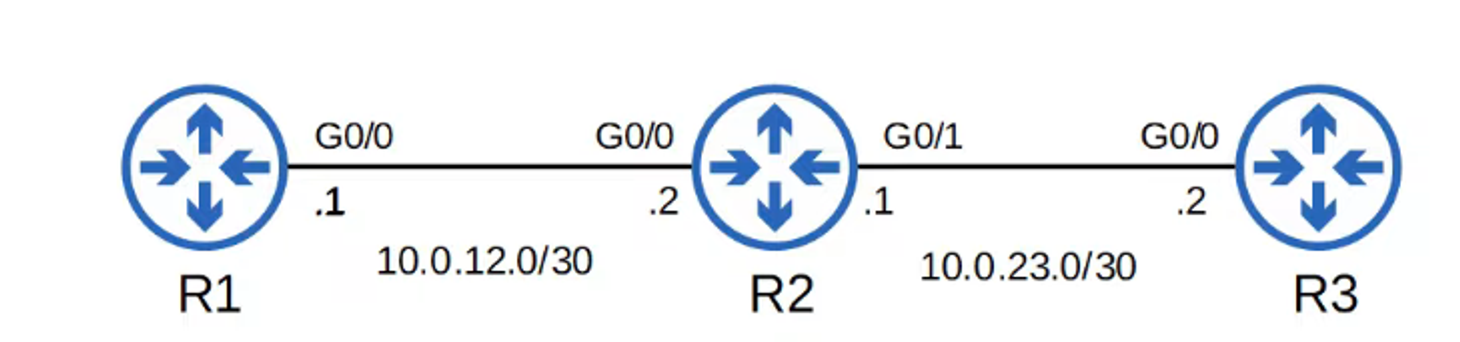
Example: Note how R3’s timestamp is completely different from R2’s.
Manual Time Configuration
-
The time on a device can be manually set with the
clock setcommand.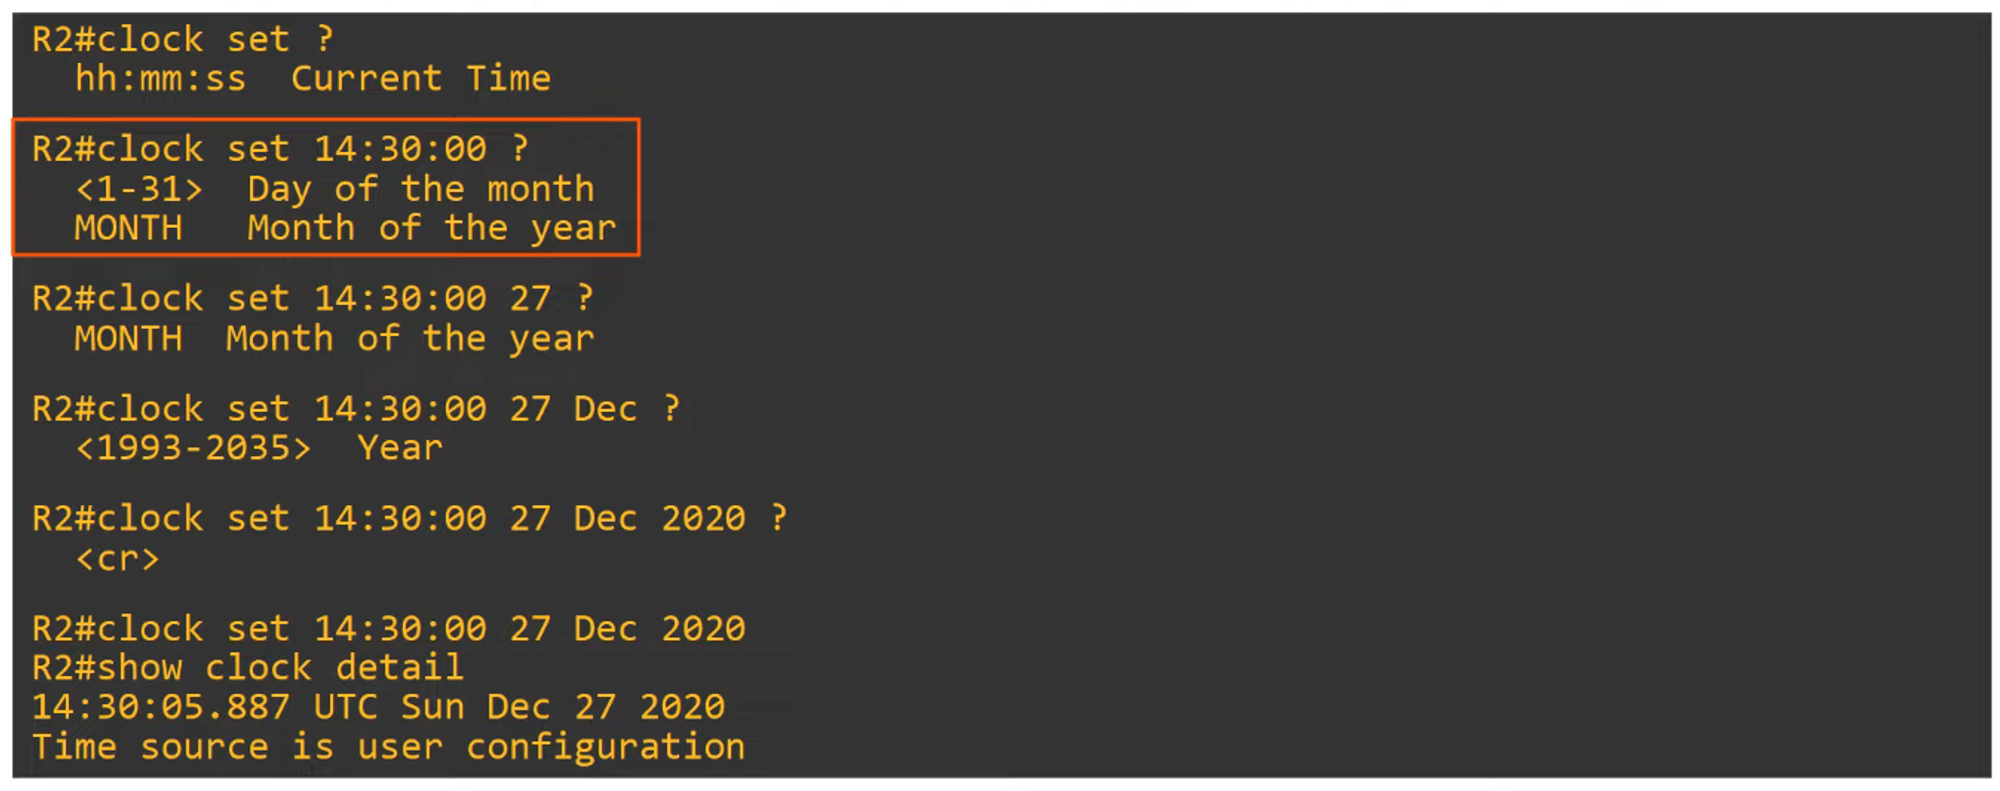
-
The hardware clock (built-in clock) is the default time source, but it can be configured separately from the software clock.
Hardware Clock (Calendar) Configuration
-
Manually configure the hardware clock using the
calendar setcommand.
-
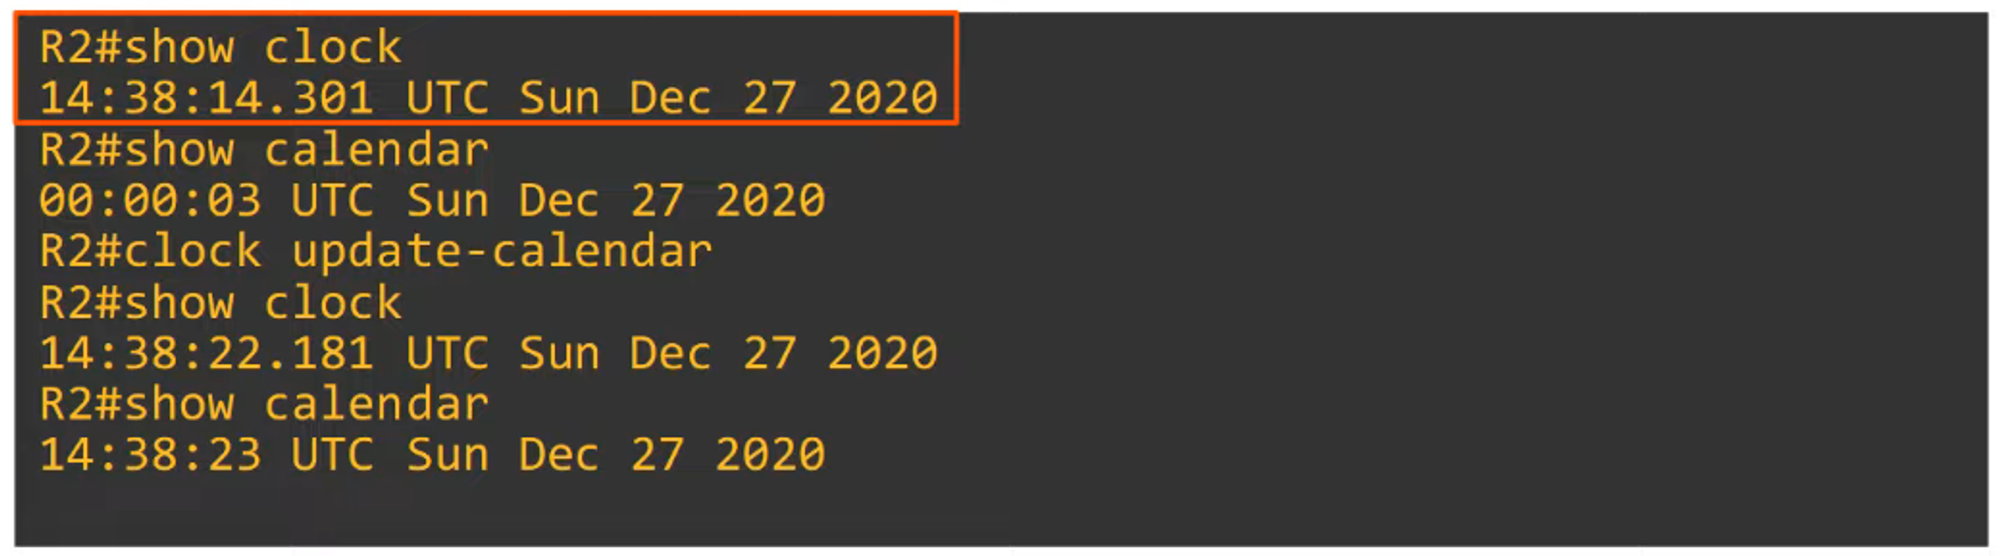
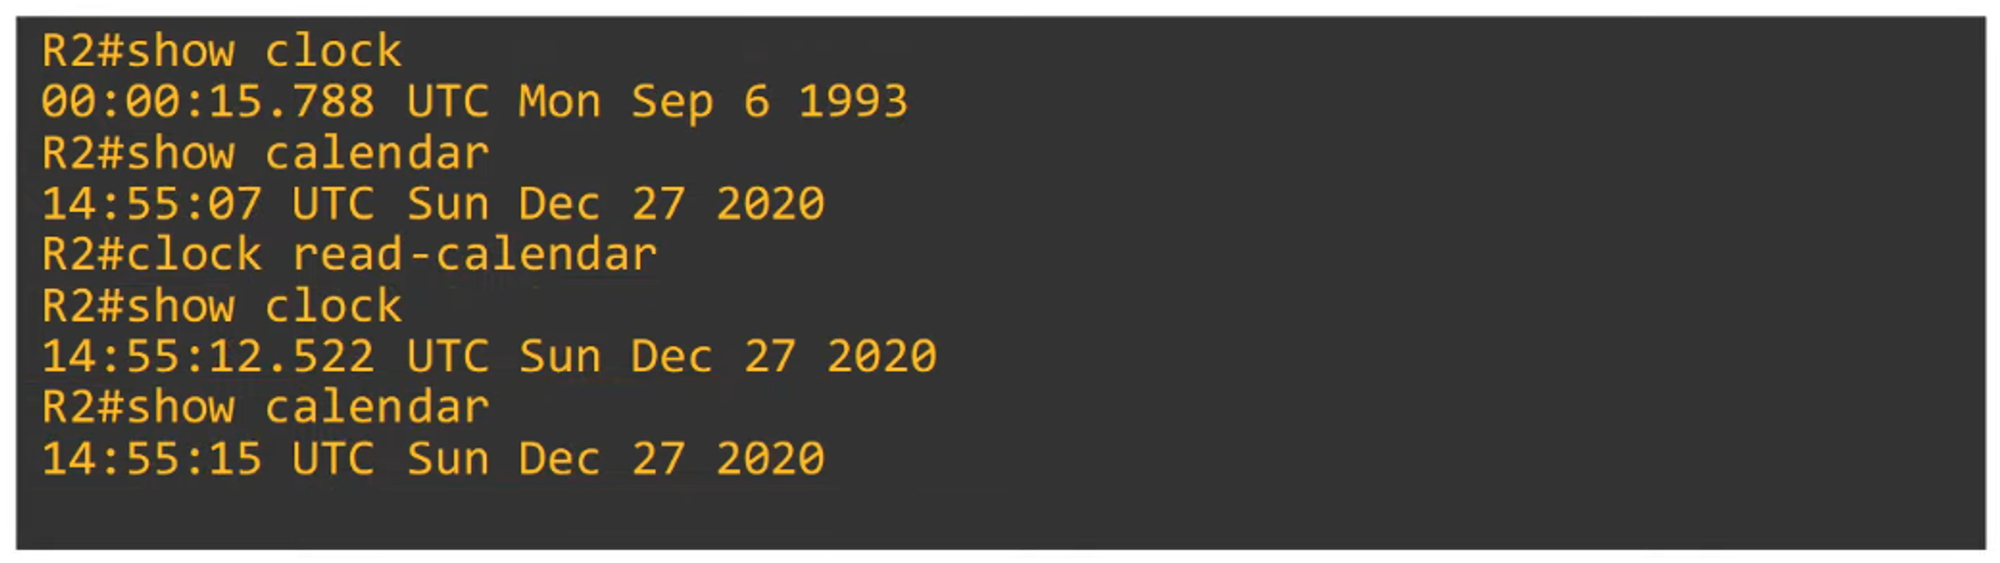
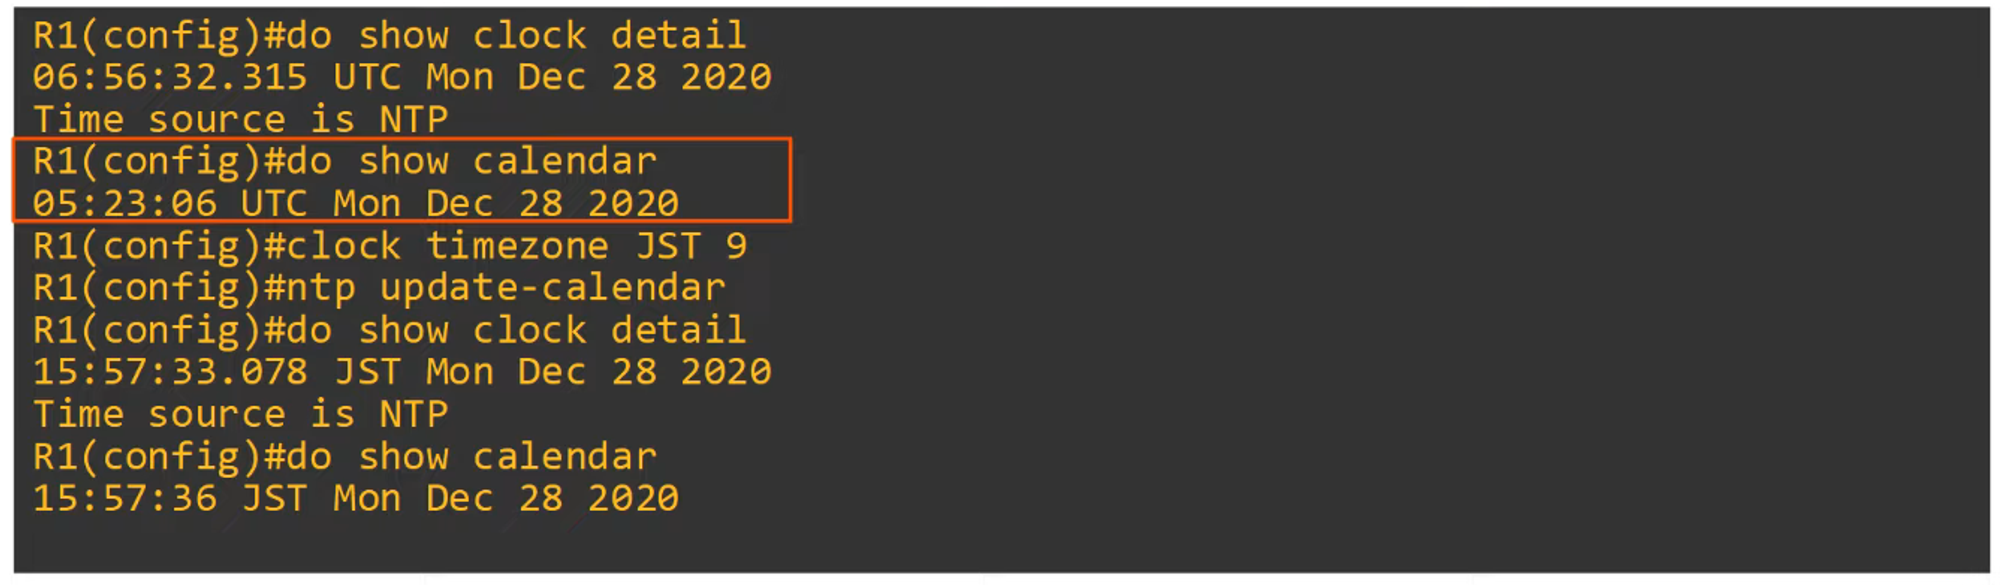
Typically, you want to synchronize the hardware clock (calendar) with the software clock:
clock update-calendar— Syncs the calendar to the clock.clock read-calendar— Syncs the clock to the calendar.
Configuring the Time Zone
-
The time zone can be set with the
clock timezonecommand.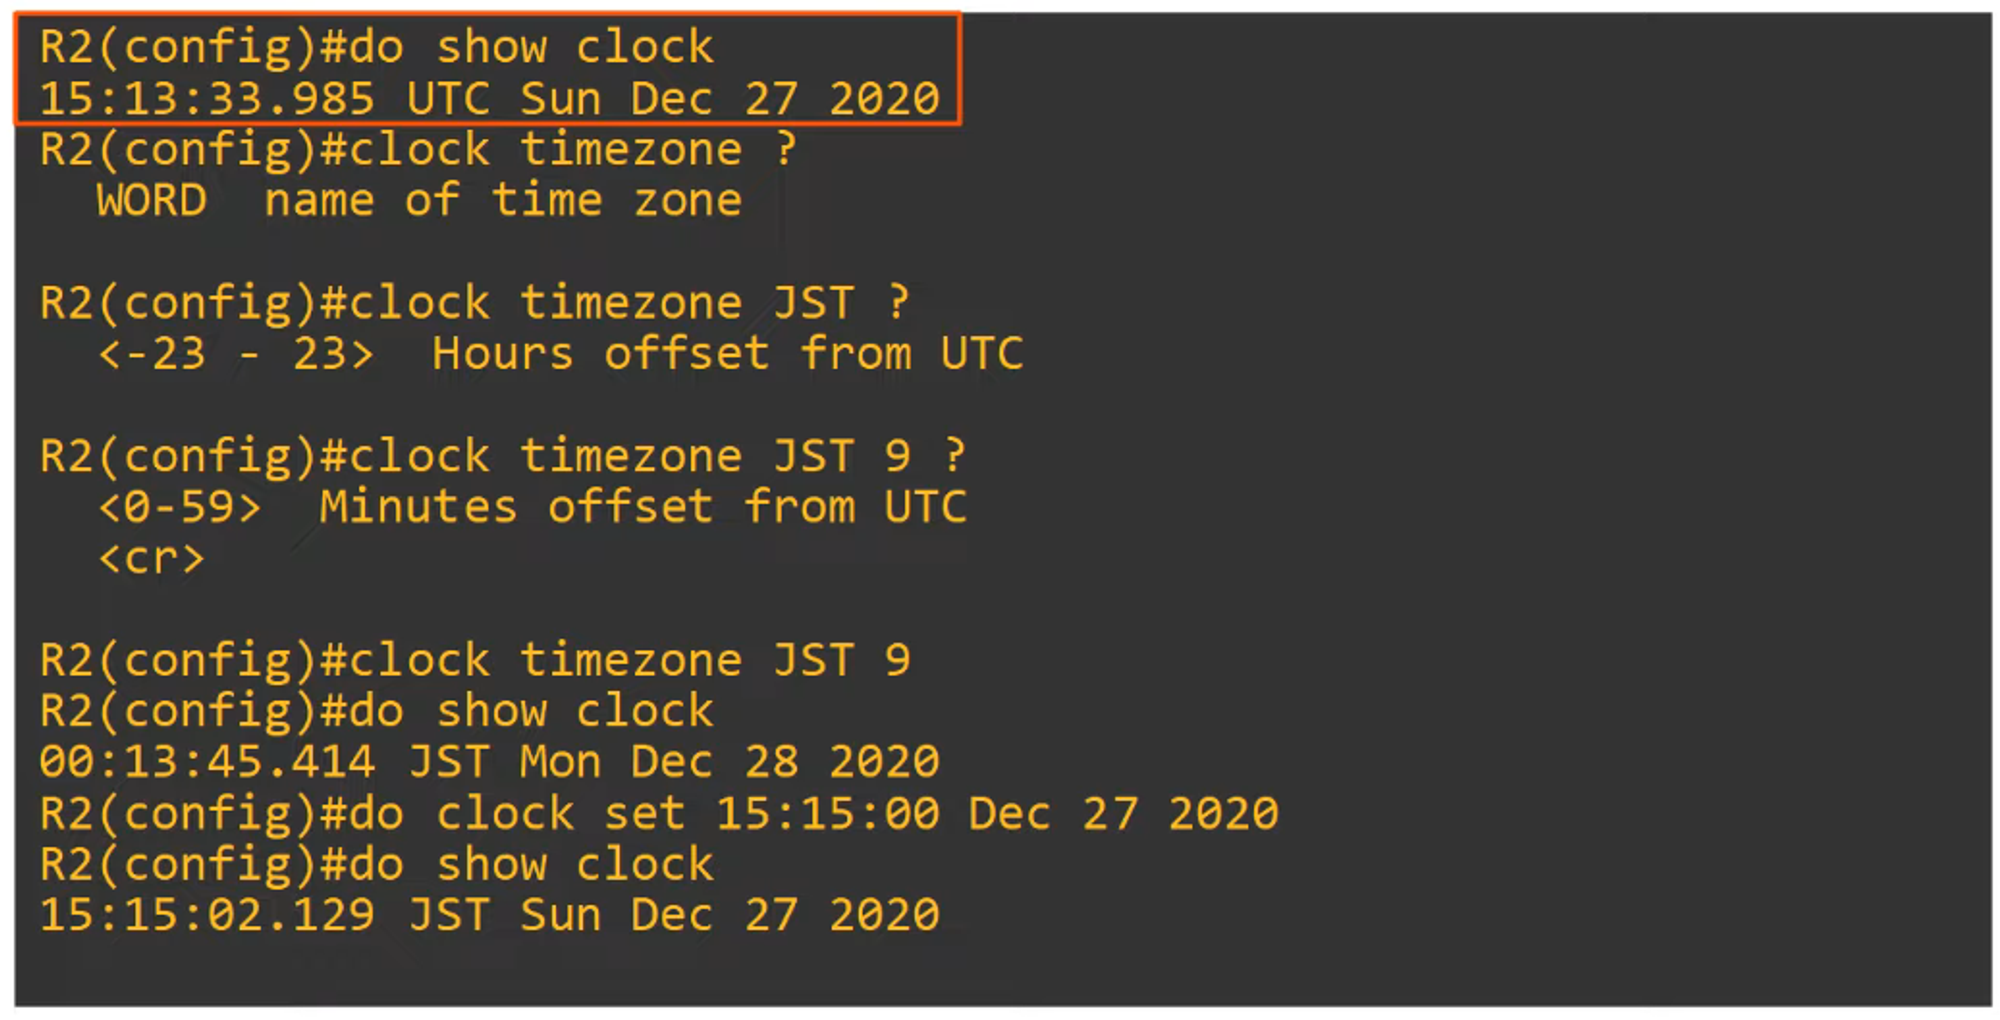
Daylight Saving Time (Summer Time)
-
Daylight saving time is set with the
clock summer-timecommand.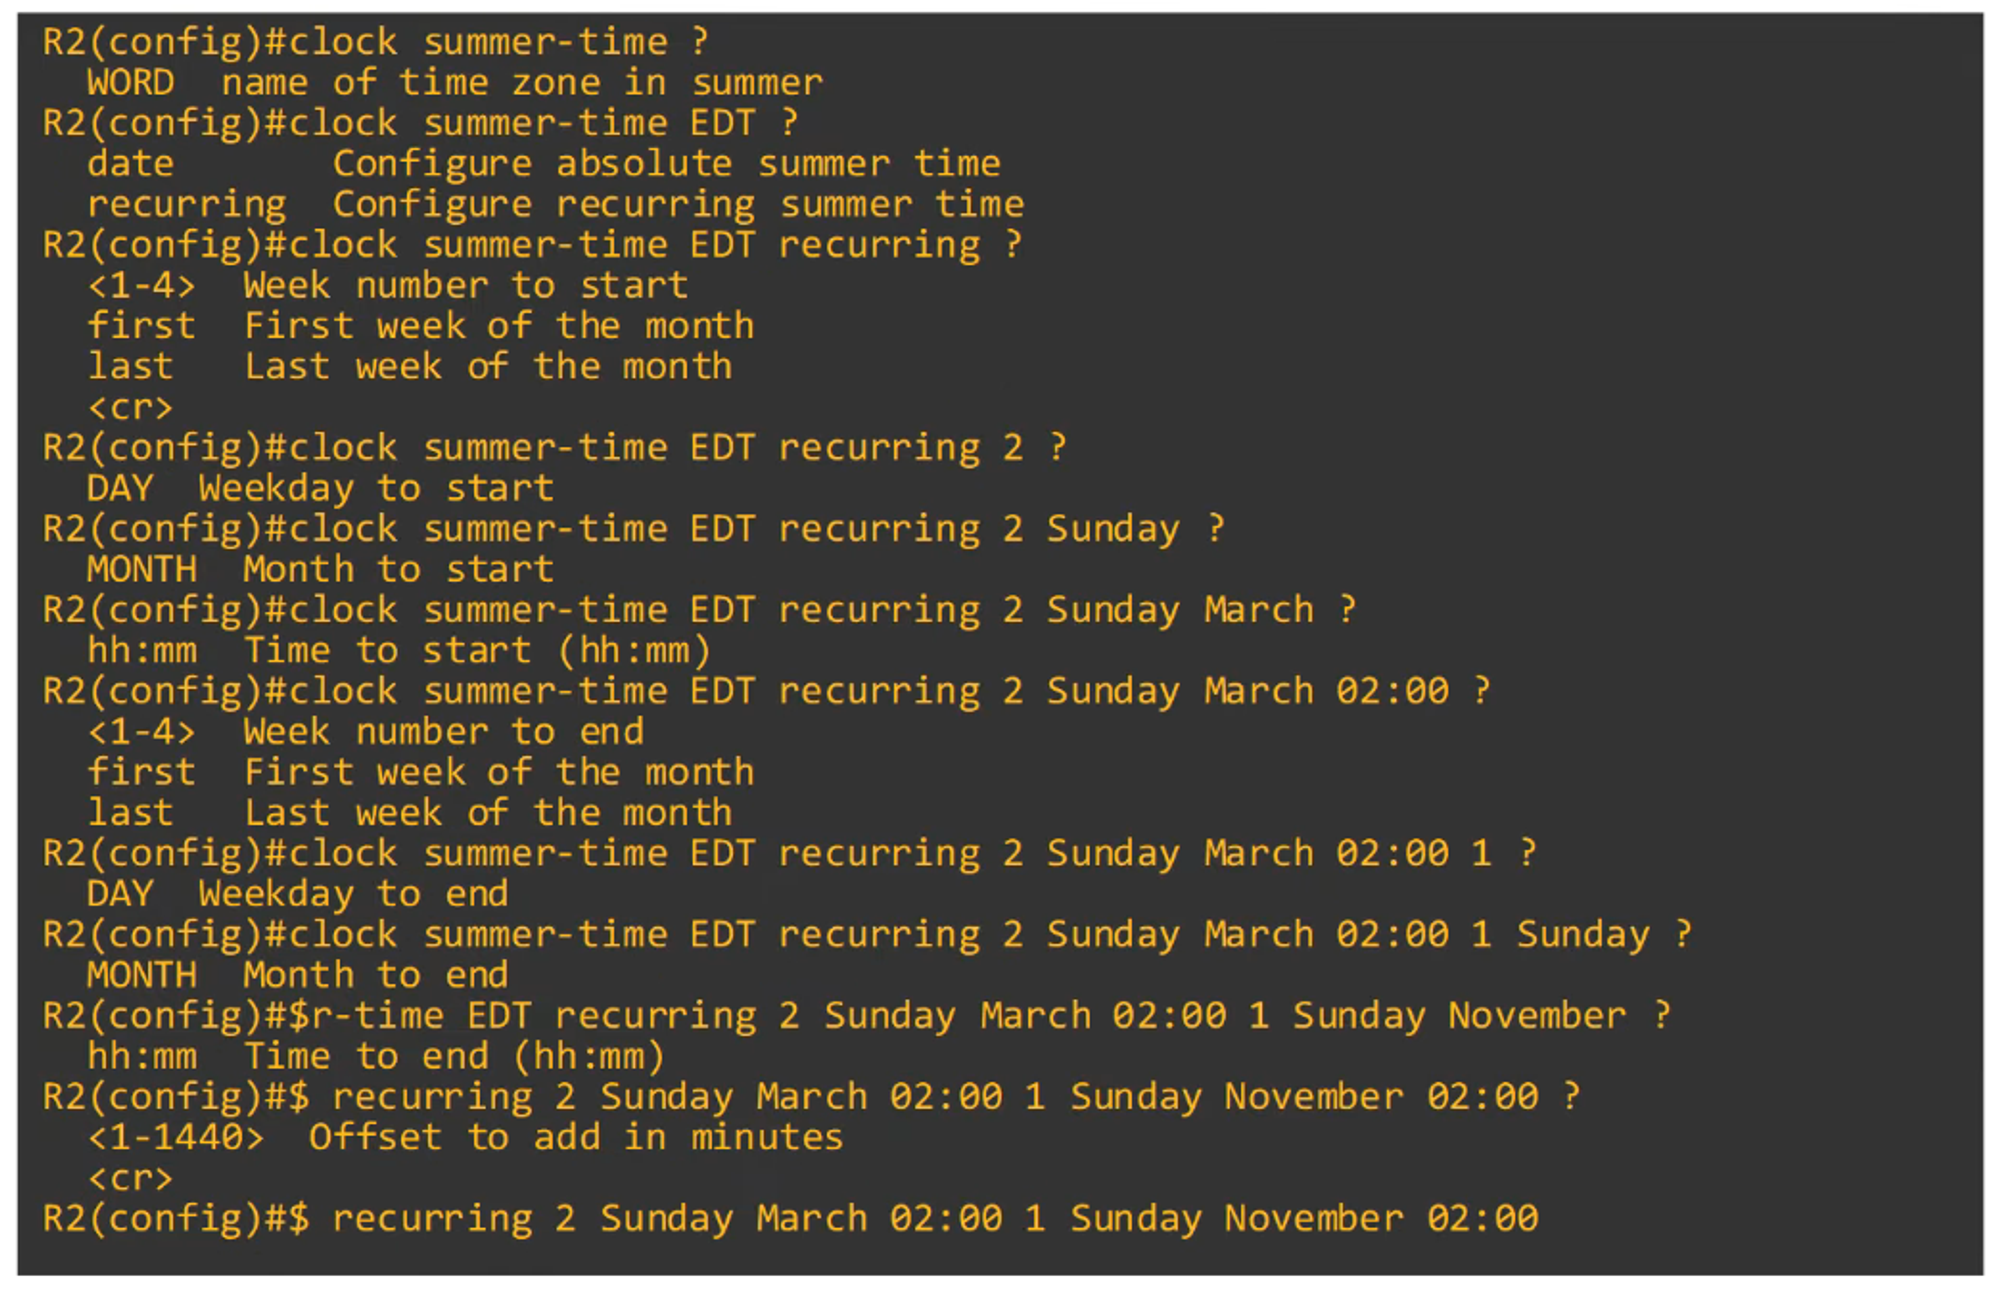

-
Example:
R1(config)# clock summer-time EDT recurring 2 Sunday March 02:00 1 Sunday November 02:00This command covers the start and end of daylight saving time.
Summary of Commands
NTP Basics
-
Manually configuring time on multiple devices is not scalable.
-
Over time, manually set clocks will drift, resulting in inaccurate time.
-
NTP (Network Time Protocol) allows automatic synchronization of time over a network.
-
NTP clients request the time from NTP servers.
-
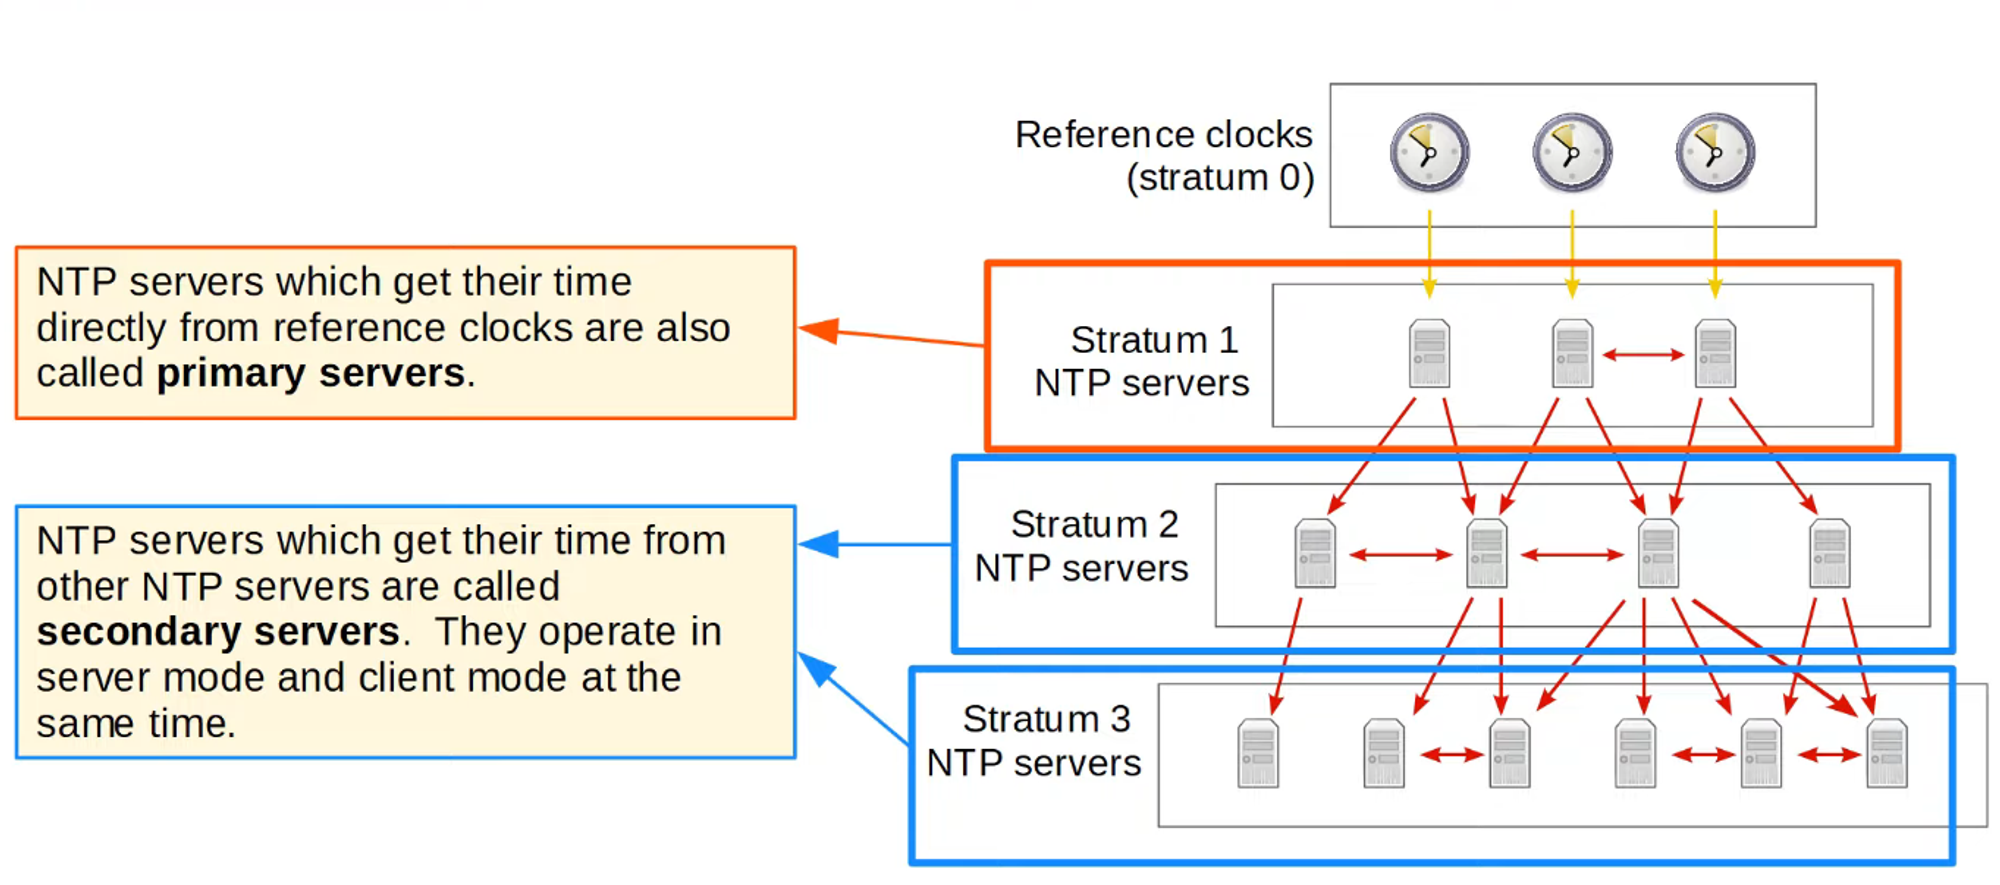
A device can act as both an NTP server and an NTP client.
-
NTP can achieve time accuracy within:
- ~1 millisecond if the NTP server is on the same LAN.
- ~50 milliseconds if the NTP server is connected over a WAN or the internet.
-
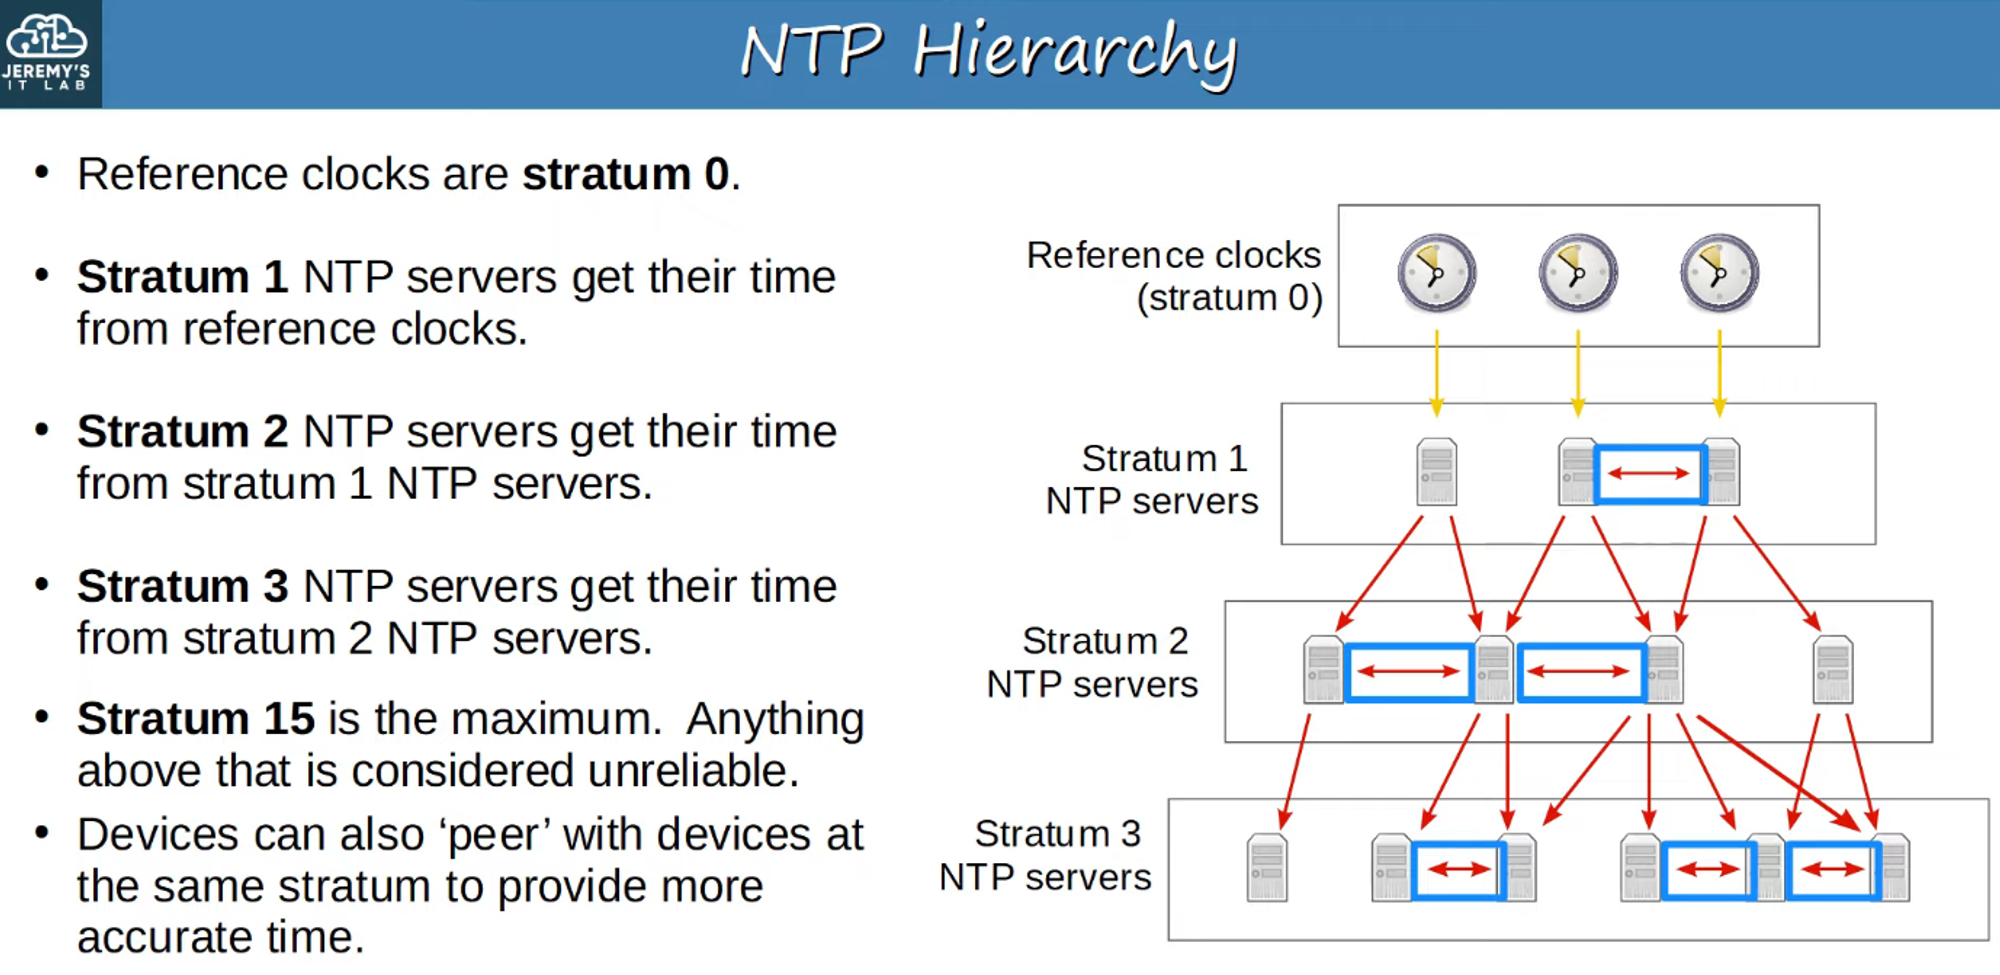
Some NTP servers are more accurate than others. The stratum level indicates the distance from the original reference clock.
Reference Clock
-
A reference clock is a highly accurate time source, like an atomic clock or GPS clock.
-
Stratum 0: Reference clocks in the NTP hierarchy.
-
Stratum 1: NTP servers directly connected to reference clocks.
-
An NTP client can synchronize with multiple NTP servers.
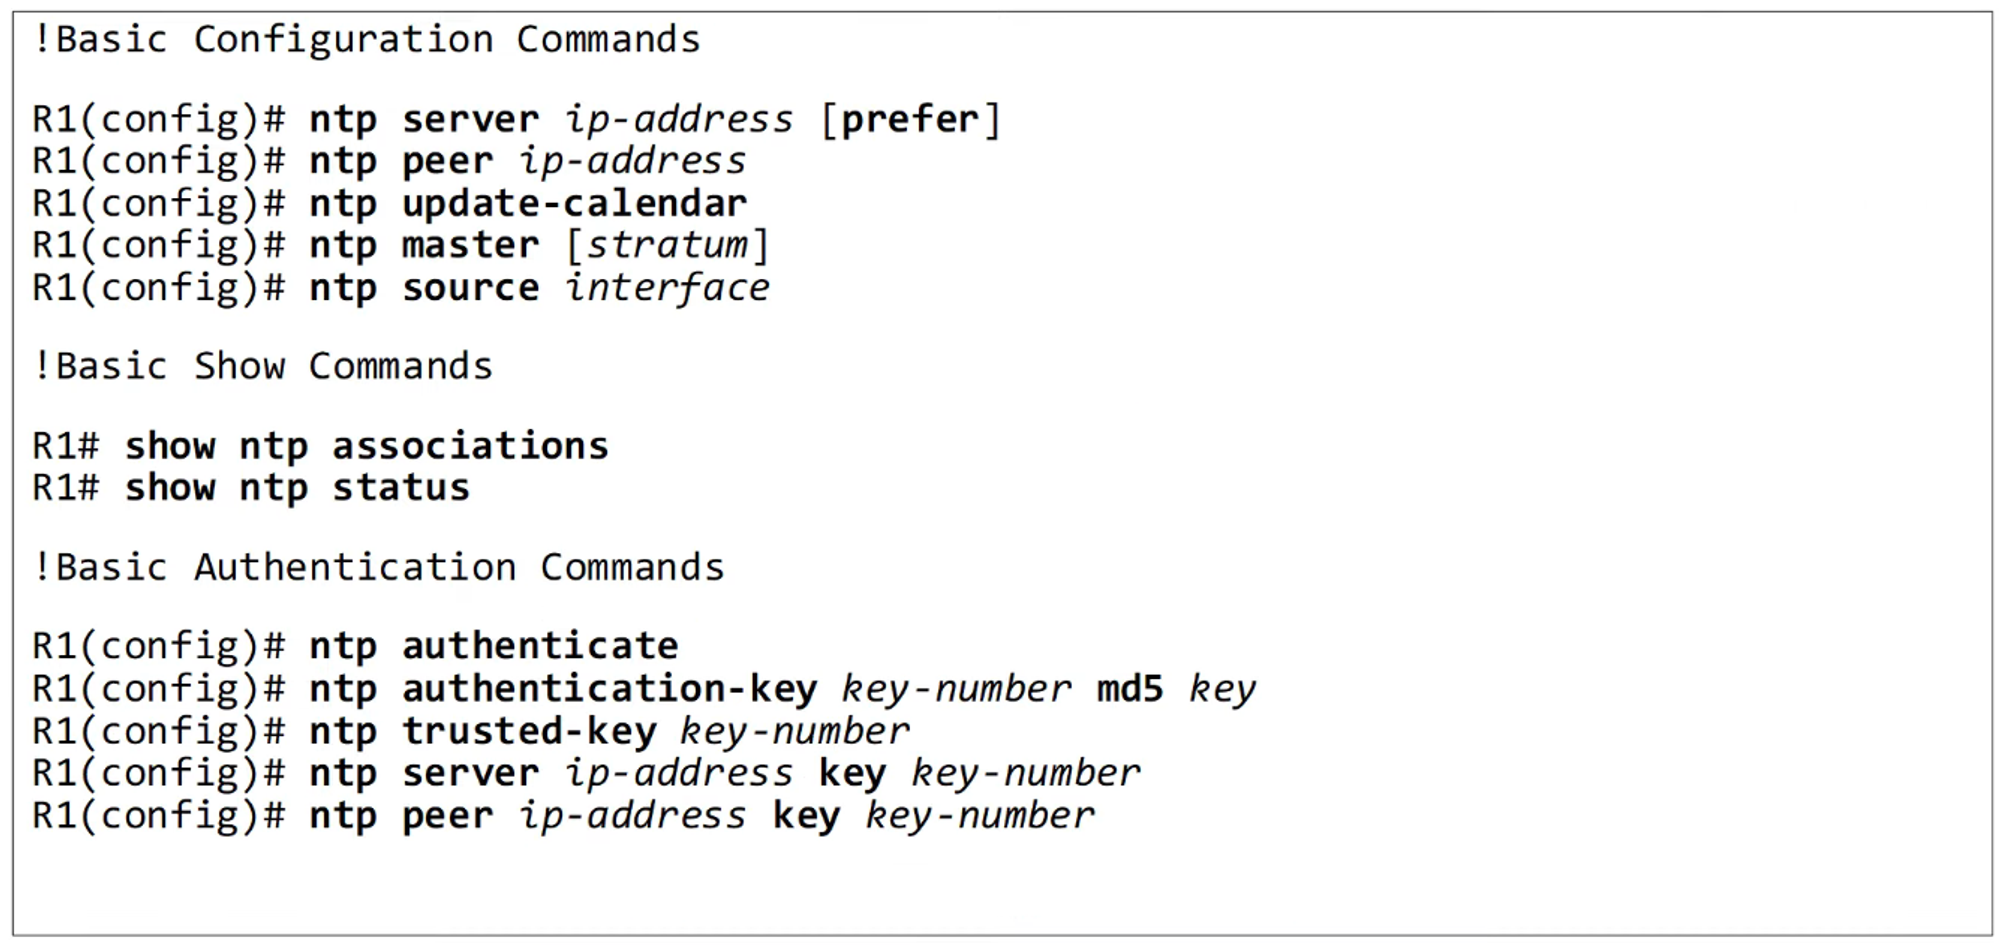
NTP Configuration
-
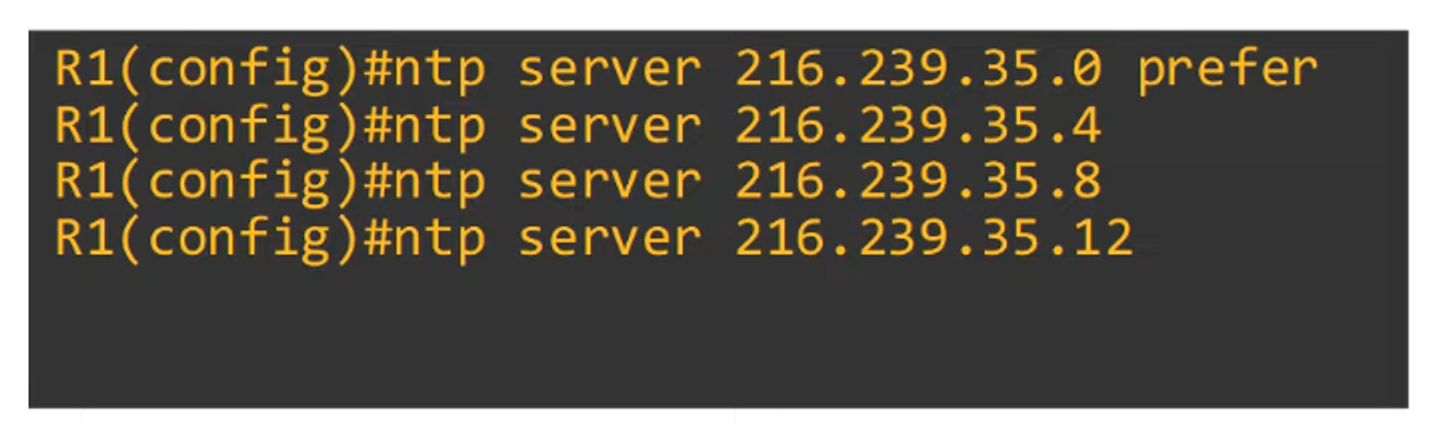
Use the prefer keyword to prioritize a specific NTP server.

-
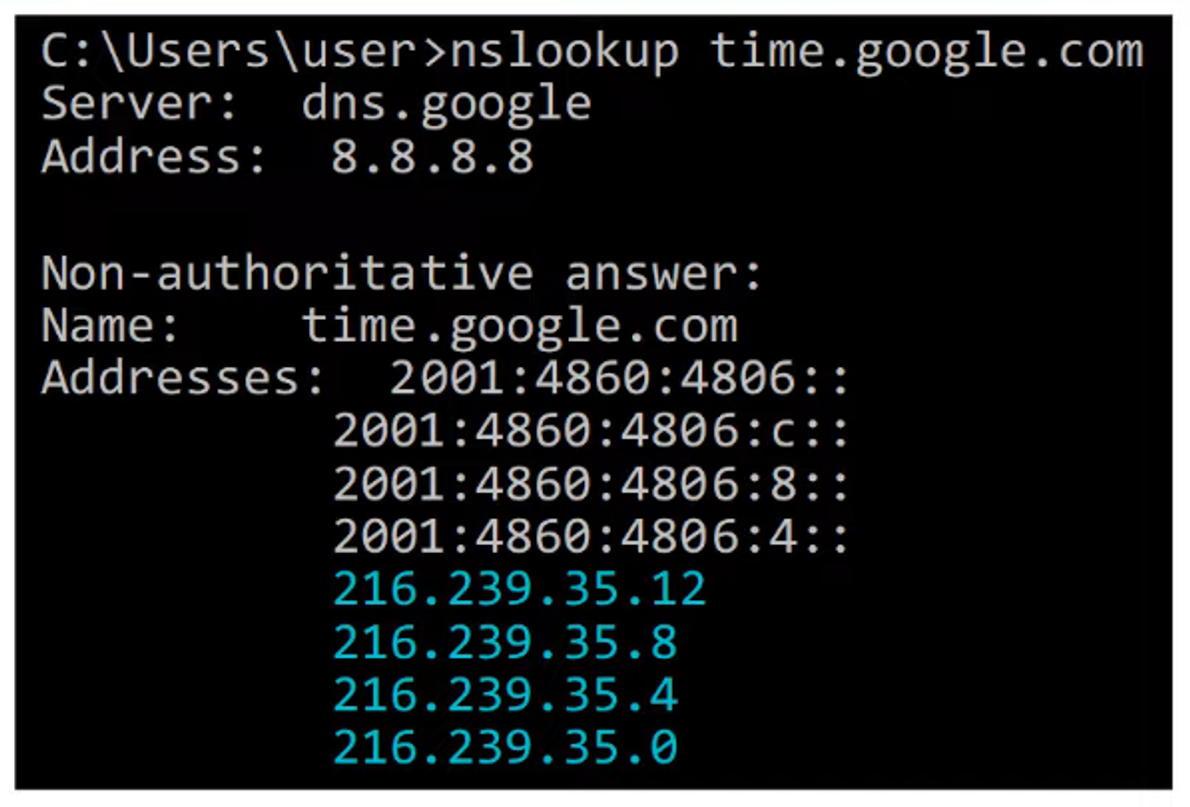
To display configured NTP servers:
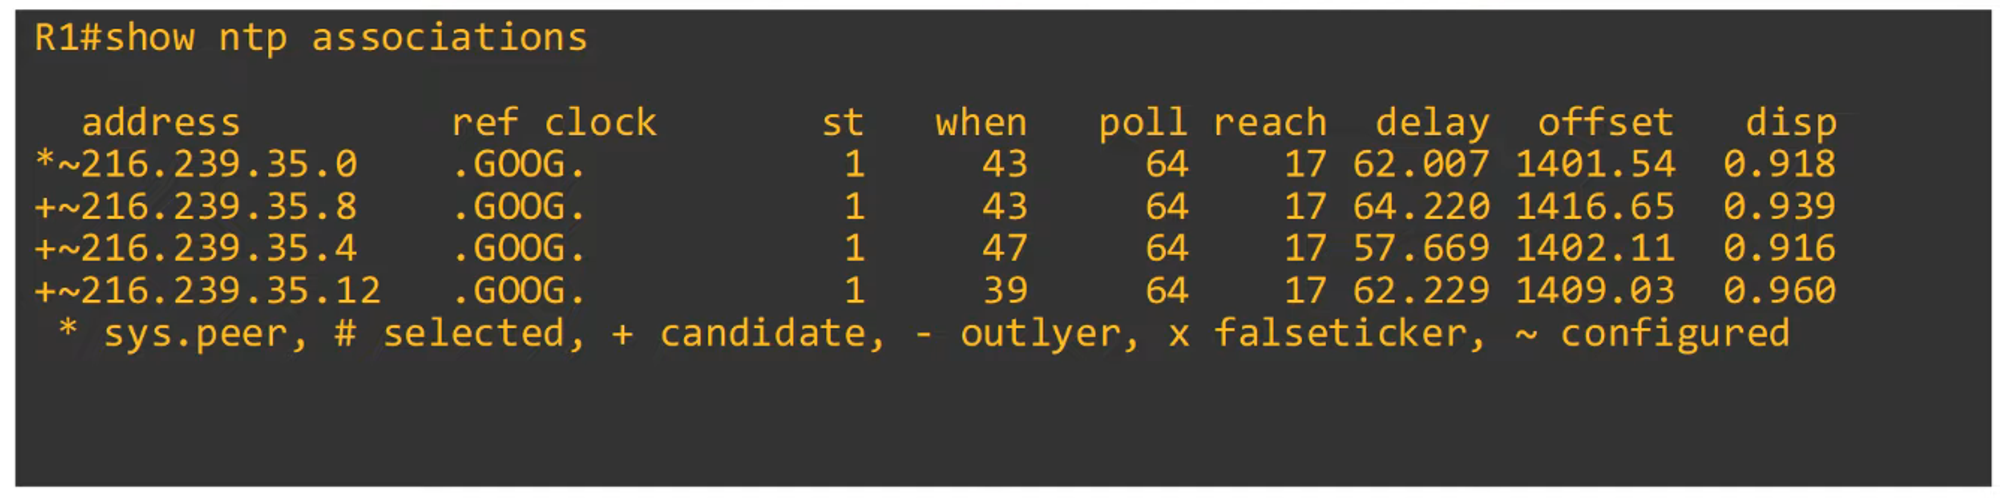
sys.peer: Indicates the server that the router is currently synchronized with.st: Stratum tier of the server.
-
To show NTP status:
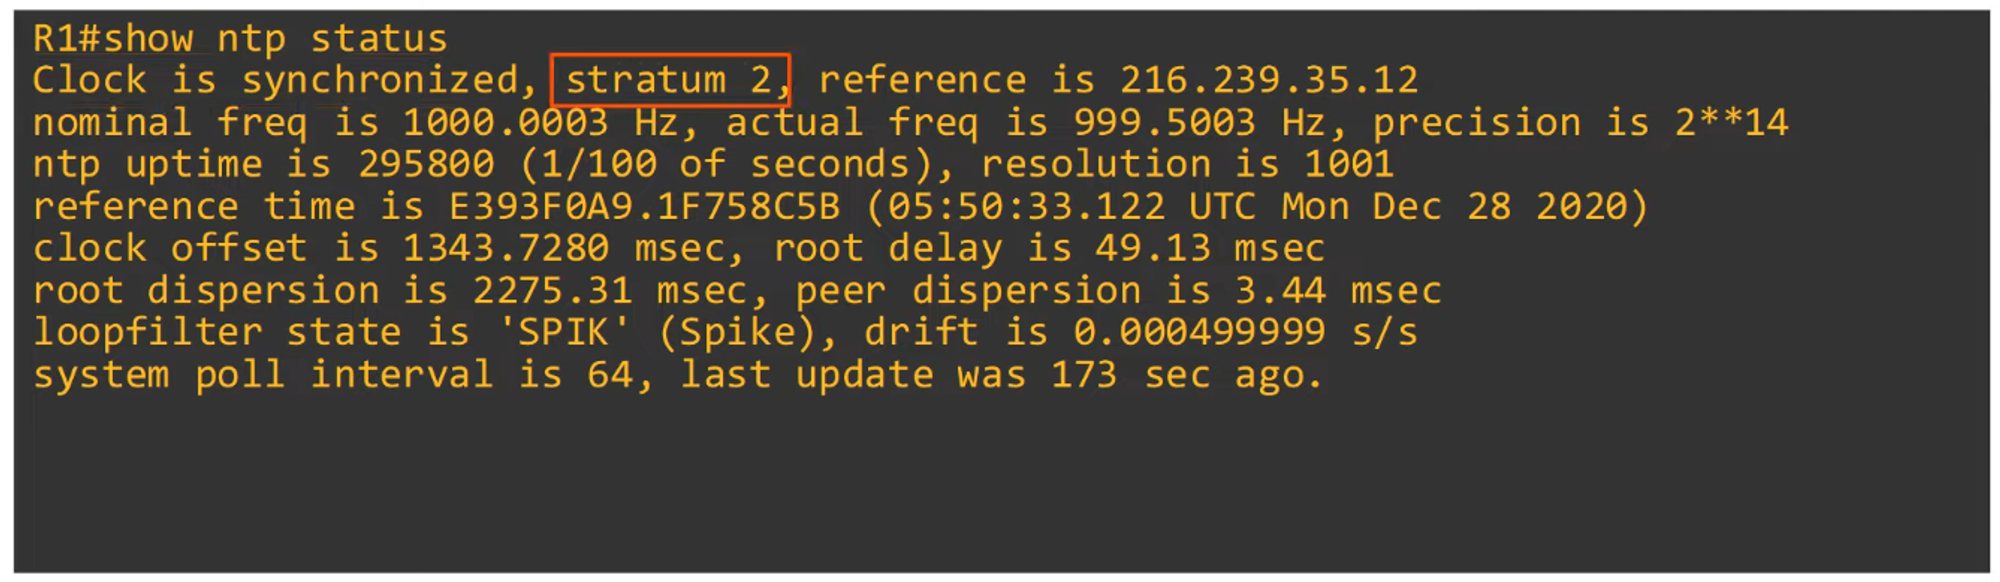
- Example: Stratum 2 indicates synchronization from a Stratum 1 server (e.g., Google).
-
To display NTP clock details:
-
Command to update the hardware clock with time learned via NTP:
R1(config)# ntp update-calendar- The hardware clock tracks time even during power loss or device restarts.
- When the system reboots, the hardware clock is used to initialize the software clock.
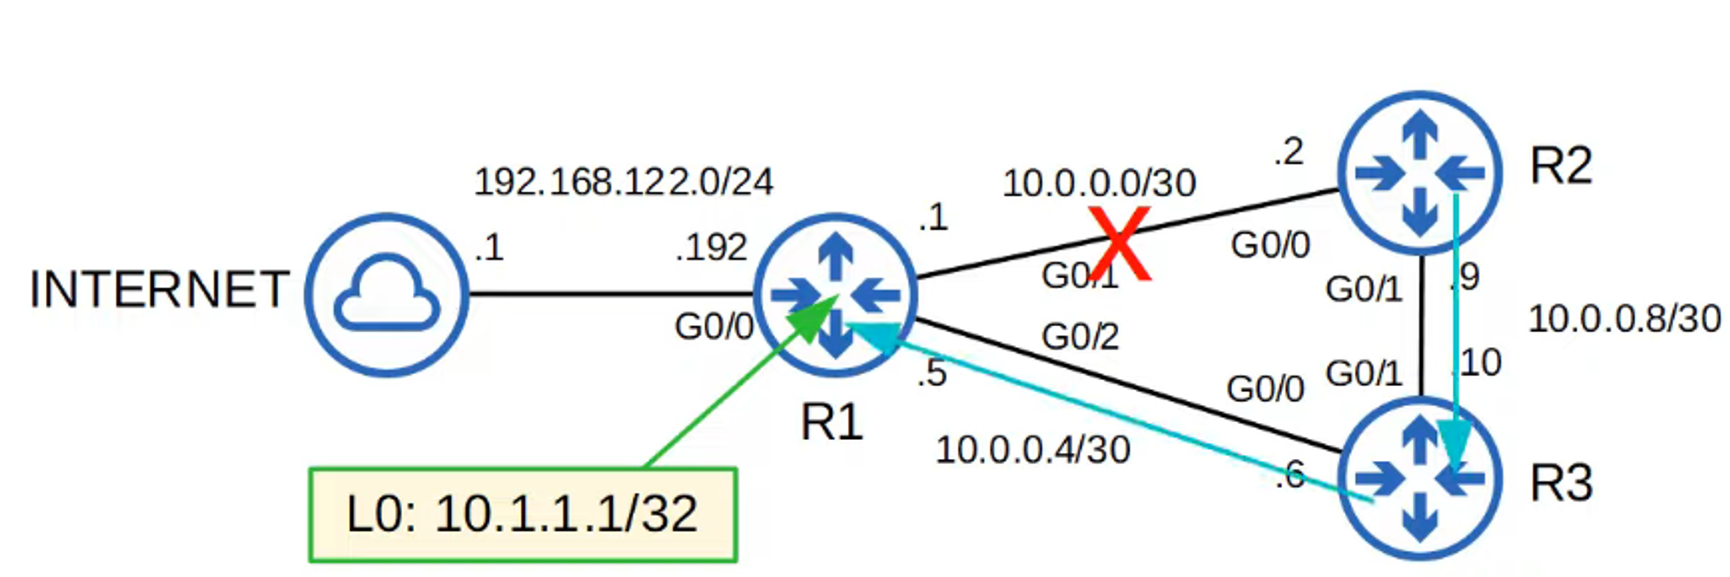
Configuring a Loopback Interface for NTP Server
-
Why configure a loopback interface for NTP on R1?
If one of R1’s physical interfaces goes down, the NTP server remains accessible via R3’s routing path.
-
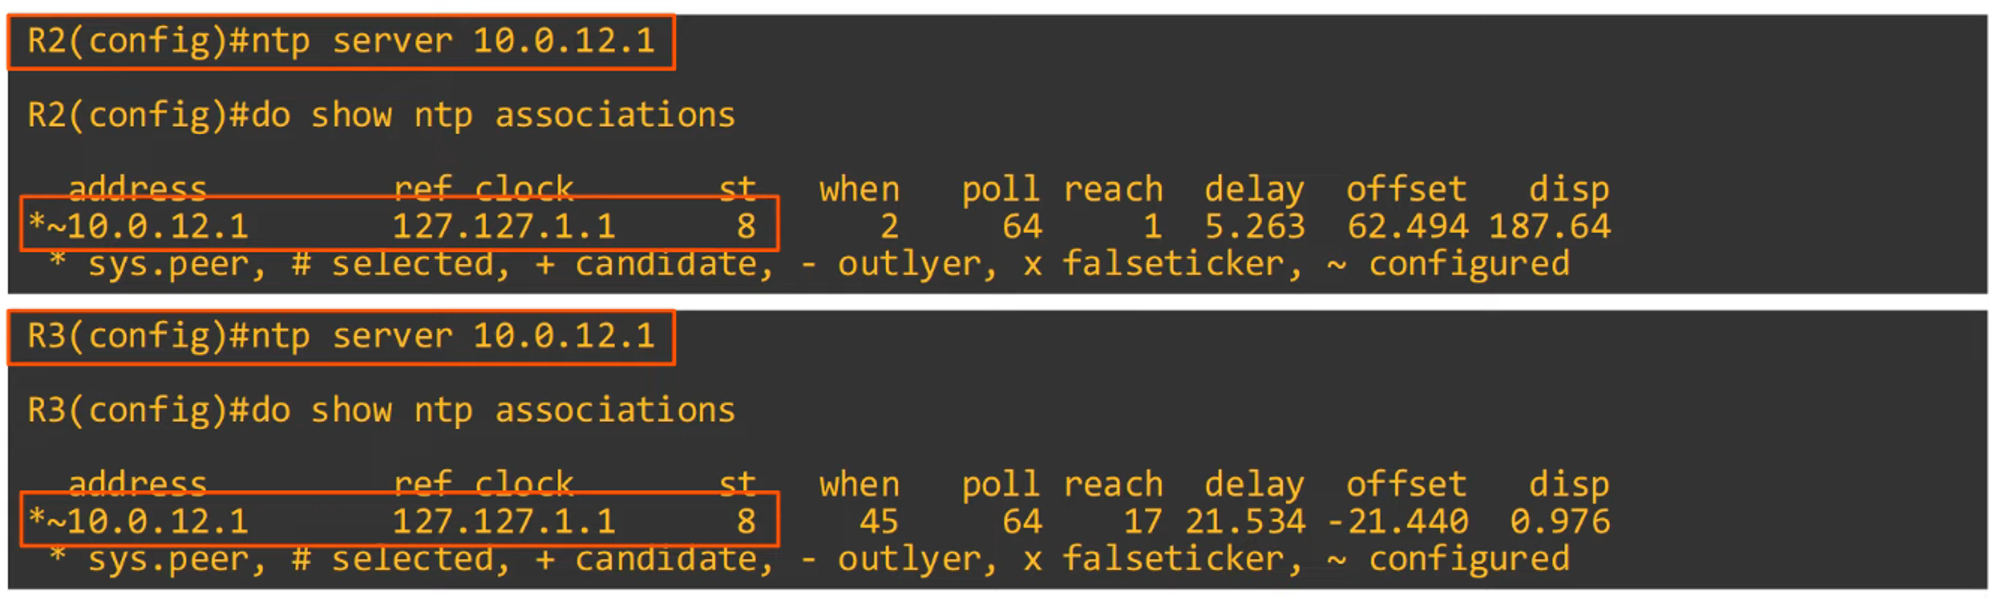
Example: Set R2’s NTP server to use R1’s loopback interface.

-
Configure R3’s NTP source servers using R1 and R2.
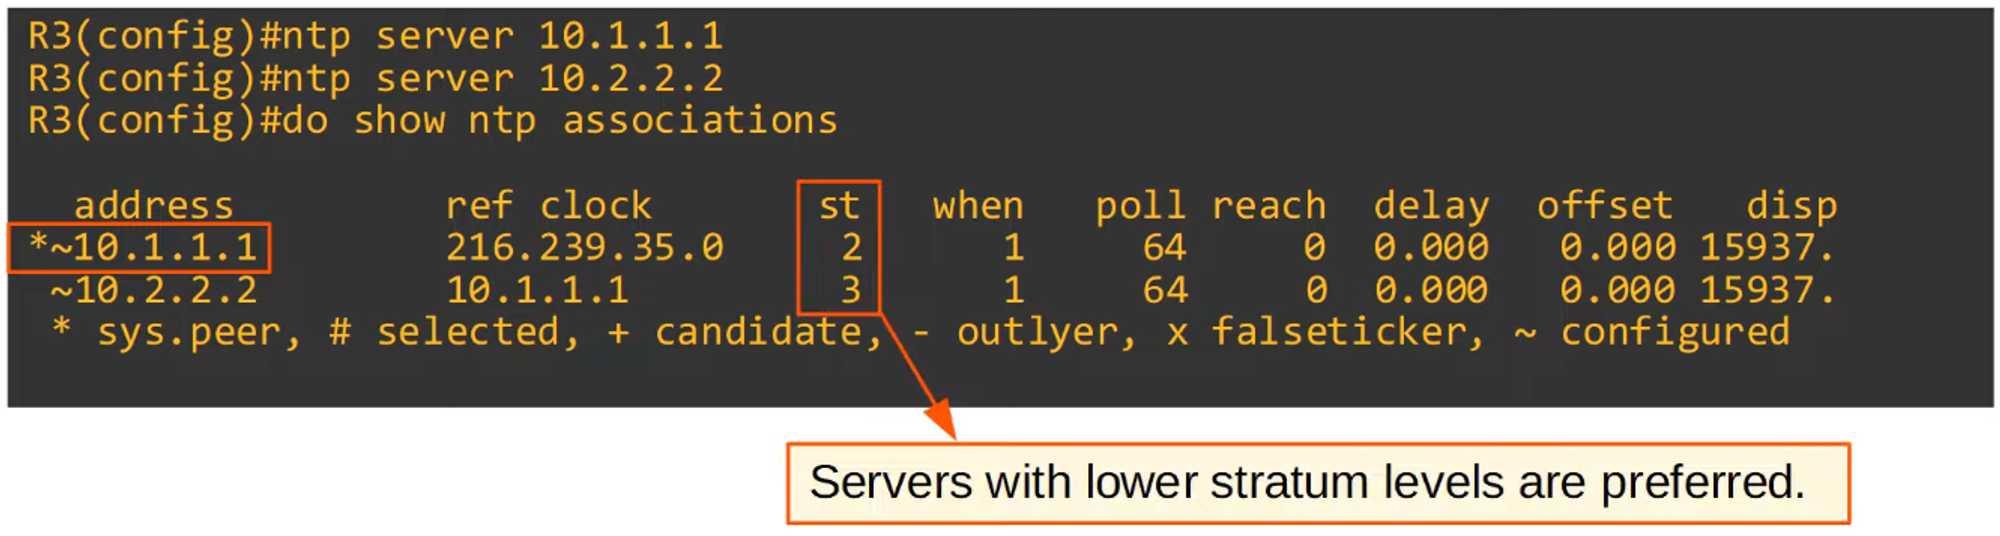
-
Note: R1 has a higher stratum tier, making it the preferred server over R2.
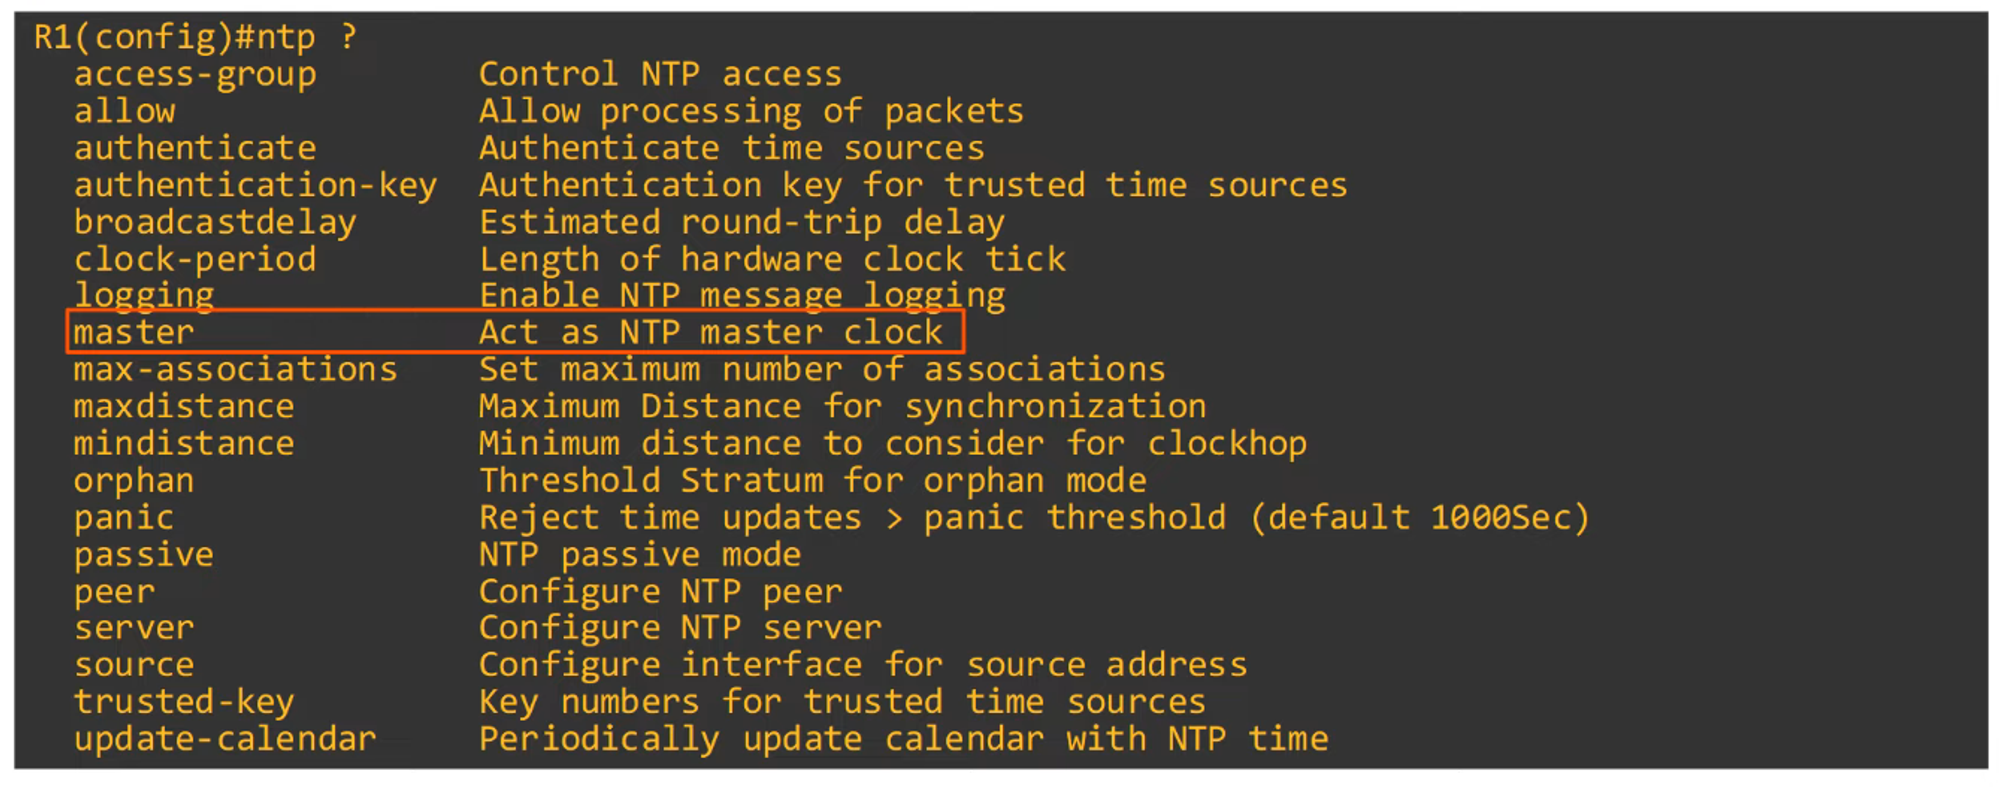
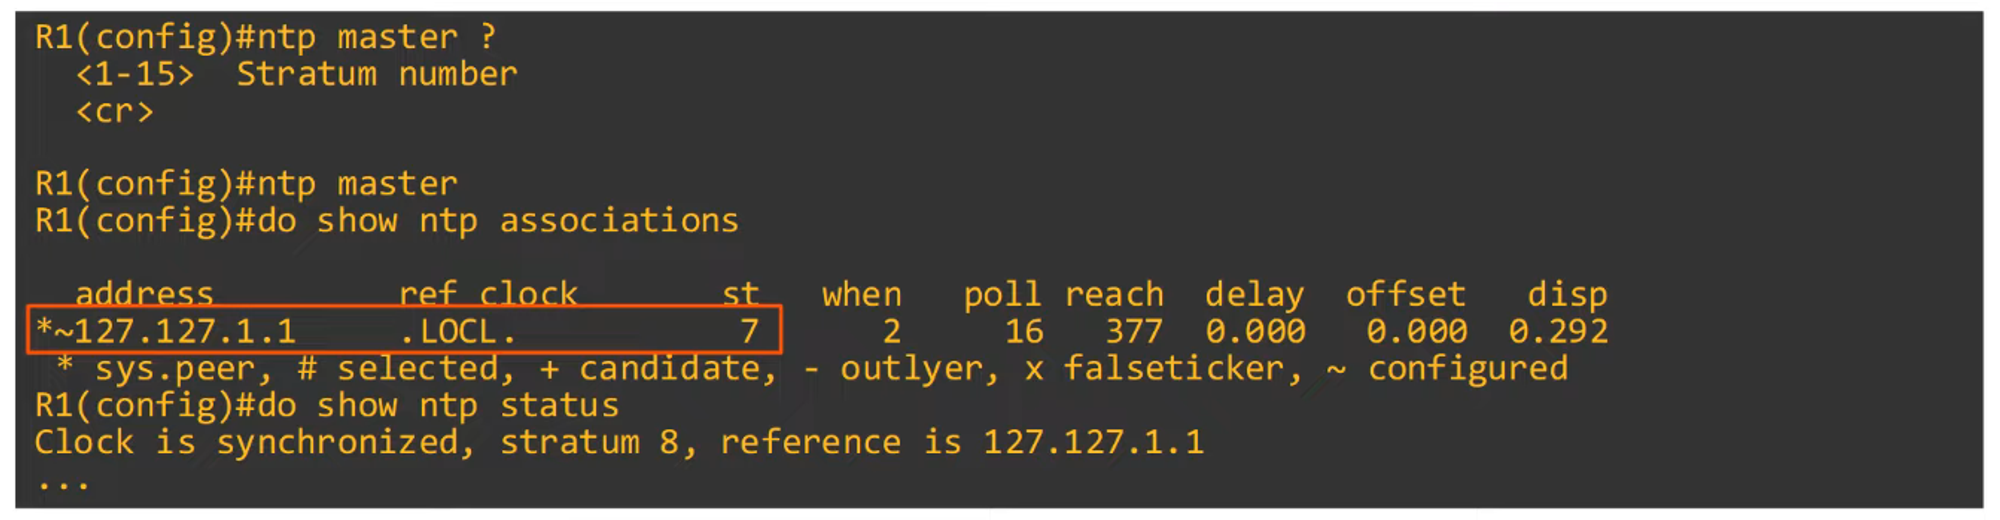
Configuring NTP Server Mode

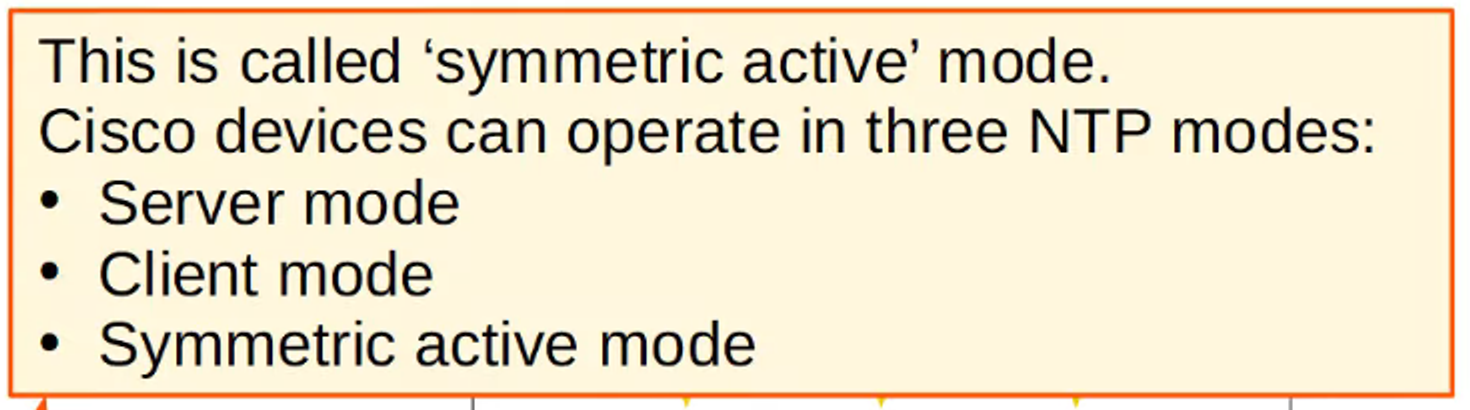
Configuring NTP Symmetric Active Mode
-
Command to configure NTP symmetric mode:
R2(config)#ntp peer <peer ip address>

Configuring NTP Authentication
-
NTP authentication is optional but adds security by ensuring clients only synchronize with trusted servers.
-
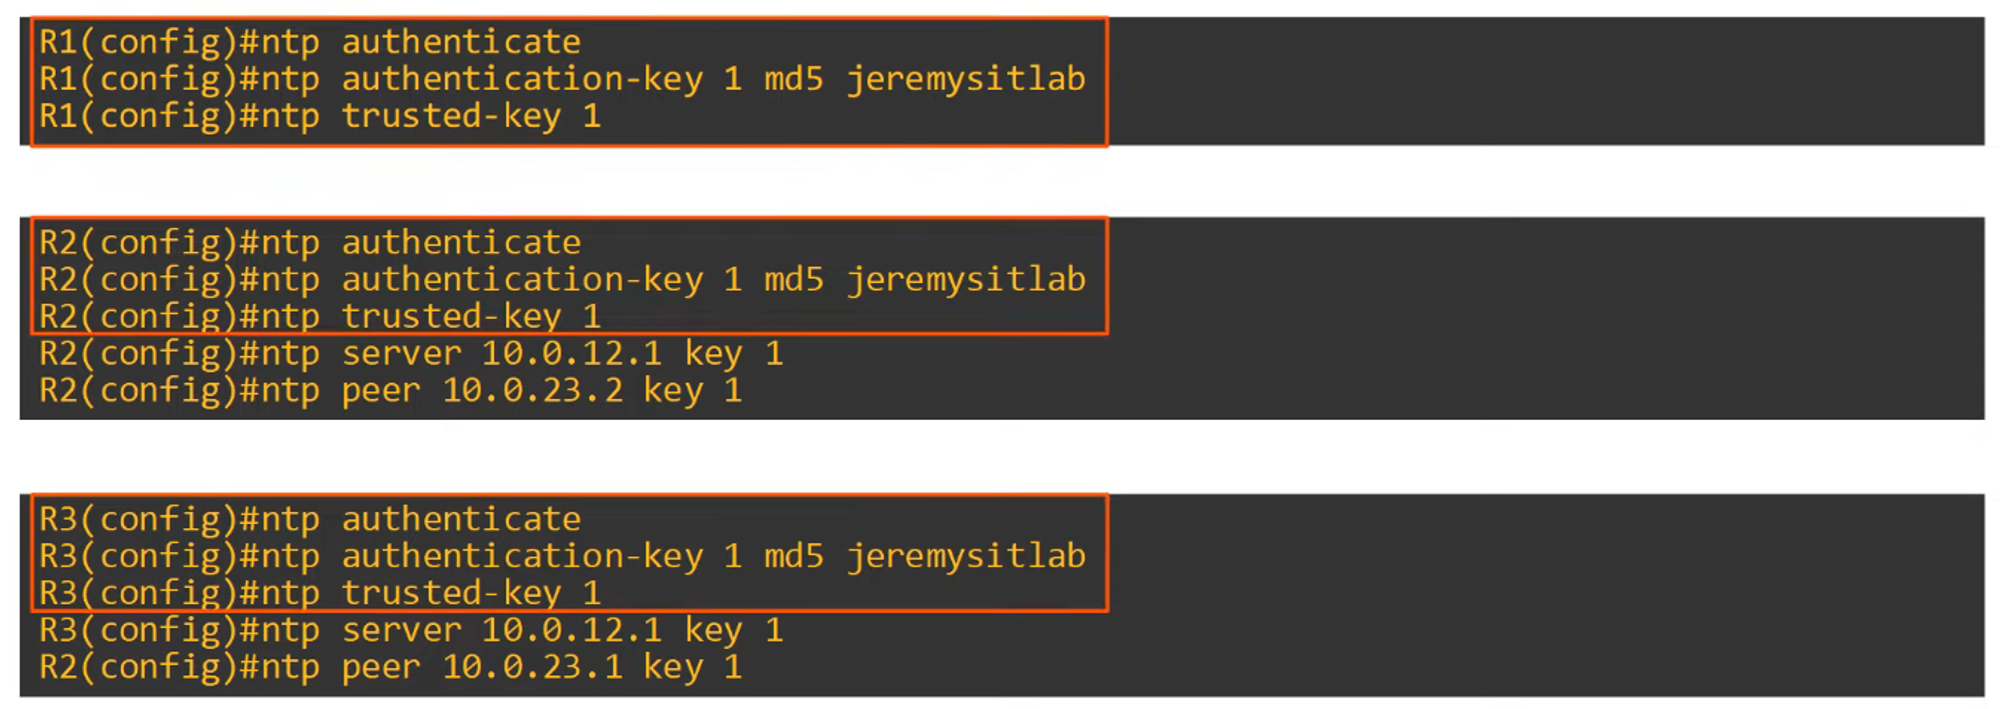
To configure NTP authentication:
ntp authenticate— Enables NTP authentication.ntp authenticate-key <key-number> md5 <key>— Creates the authentication key.ntp trusted-key <key-number>— Specifies the trusted key.ntp server <ip-address> key <key-number>— Assigns a key to a specific server.
Example configuration:
NTP Command Review